How to Fix Smart Lights Flashing Red During the Setup Process?
Setting up a new smart light should feel exciting. But then that little bulb starts flashing red, and your excitement turns into confusion.
You are not alone. This is one of the most common issues people face during smart light setup.
The good news? A flashing red light does not mean your bulb is broken. It simply means the device is stuck during the connection process.
Most often, this happens because of a Wi-Fi mismatch, a pairing mode mix-up, or leftover app data from a previous setup.
In this guide, we will break down exactly why your smart light flashes red and how to fix it step by step.
In a Nutshell
- Reset first. Unplug the bulb or hold the power button for 10 seconds. This clears old errors and starts fresh.
- Delete old app data. Remove the bulb from any linked apps before you try to reconnect it. Leftover data often causes red flashing.
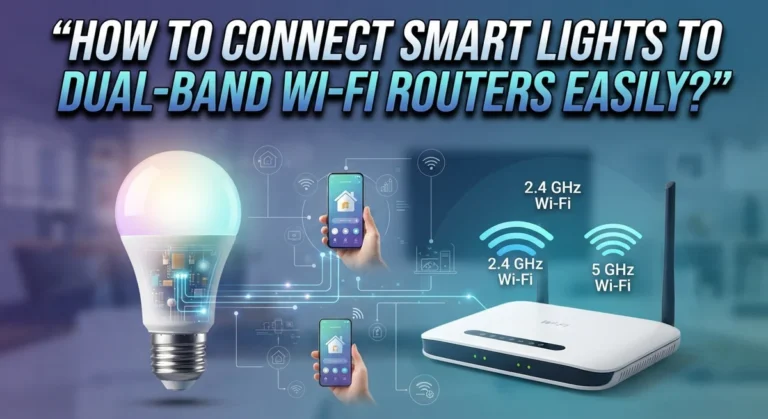
- Check your Wi-Fi band. Your bulb needs a 2.4 GHz network. It will not connect to 5 GHz, no matter how many times you try.
- Match the pairing mode. Rapid blinking means EZ mode. Slow blinking means AP mode. Pick the right one in your app settings.
- Be patient with switching. Let the app fully finish searching before you change pairing modes. Switching too soon often causes new errors.
- Multi-color flashing is normal. It simply means the bulb entered factory test mode. Just continue with setup as usual.
What Does a Flashing Red Light Actually Mean?
A flashing red light on your smart bulb sends a specific message during setup. It tells you the bulb cannot connect to your Wi-Fi network or complete the pairing process. This is not a sign that your bulb is broken or defective.
The red flash appears because your bulb is searching for a connection. Think of it like a phone trying to find a signal. When the bulb cannot locate the right network or pair with your app, it flashes red to alert you that something needs adjustment.
Your bulb operates in two different pairing modes. EZ mode shows rapid blinking, which means the bulb is actively searching for your Wi-Fi. AP mode shows slow blinking, which means the bulb created its own temporary network for direct connection. The type of blinking you see tells you which mode your bulb is currently in.
Several issues trigger red flashing. Your Wi-Fi network might be on the 5 GHz band, which most smart bulbs cannot use. The bulb might still have old data stored from a previous setup attempt. Your phone app might not be communicating properly with the bulb. Distance and signal strength can also play a role.
The key point: red flashing means “I need help connecting,” not “I am broken.” Your bulb’s hardware is fine. The issue is always with the connection process or your network settings.
When you see red flashing, stay calm and work through the reset steps methodically. Check your Wi-Fi frequency first. Delete the bulb from your app completely. Then unplug the bulb for a full reset. These actions address the root causes of red flashing almost every time.
Understanding what the red light means helps you troubleshoot faster and feel confident about fixing the problem yourself.
Understanding EZ Mode vs AP Mode Pairing
Your smart light uses two different pairing modes to connect to your Wi-Fi network. Understanding the difference between them helps you fix flashing red lights quickly.
EZ Mode activates when your bulb blinks rapidly. This mode works best for most home setups. The bulb searches for your Wi-Fi network automatically and pairs faster than the alternative. You see quick, frequent flashes when EZ mode is active. Most people succeed with this mode on their first try.
AP Mode appears when your bulb blinks slowly. This mode works differently. Instead of searching for your network, the bulb creates its own temporary access point. Your phone connects directly to the bulb first, then tells the bulb your Wi-Fi details. This mode helps when EZ mode fails to find your network.
The key difference: EZ mode finds your network. AP mode lets you manually tell the bulb where to connect.
When should you switch modes? If your bulb blinks rapidly for over two minutes without connecting, try AP mode. Wait for the app to finish searching first. Switching too quickly confuses the setup process and causes more red flashing.
Here’s what matters most: Rapid blinking equals EZ mode. Slow blinking equals AP mode. Your app tells you which mode is active during setup. Check your app screen to see the current blinking pattern.
Many people make the mistake of switching modes before the app completes its search. This breaks the connection attempt. Let the app timeout naturally before changing modes.
Your Wi-Fi band also affects which mode works best. Both modes need a 2.4 GHz network to function properly. If your network only broadcasts 5 GHz, neither mode will succeed.
Start with EZ mode since it’s simpler. Switch to AP mode only if EZ mode fails after two minutes of rapid blinking.
Step-by-Step: Resetting Your Smart Light to Factory Settings
Resetting your smart light to factory settings is the most effective way to clear connection problems. This process erases all previous pairing data and returns your bulb to its original state.
Start by unplugging your smart light from the power source. Wait for 30 seconds to ensure all power drains completely. This step matters because it forces a hard reset on the device’s internal systems.
If your bulb has a physical power button, press and hold it for 10 seconds while the device remains unplugged. You should see the light dim or change color briefly. This confirms the reset is working.
Alternatively, use the manual switch reset method. Turn your wall light switch on and off rapidly 10 times in succession. The bulb will flash multiple colors during this process. Continue until you see a specific pattern like three flashes or a color change sequence. This indicates factory reset mode has activated.
Before reconnecting to your app, delete the bulb from all linked applications. Open each app where you previously added the bulb and remove it completely. This step prevents your phone from trying to reconnect to old settings automatically.
Now you’re ready to reconnect. Plug the bulb back in or flip the wall switch to the on position. The bulb should begin flashing, typically in rapid or slow patterns depending on the pairing mode.
Download or open your smart light app fresh. Search for new devices in the app’s setup section. Your reset bulb should appear as an unconnected device ready for pairing.
Follow the app’s on screen instructions to complete the connection process. Make sure your Wi-Fi network operates on 2.4 GHz, as most smart lights do not support 5 GHz bands. Your bulb should connect successfully once you’ve completed these factory reset steps.
Step-by-Step: Reconnecting Your Bulb to the App and Wi-Fi
Start by opening your smart light app on your phone. Look for the option to add a new device or bulb. Tap this button to begin the pairing process.
Make sure your phone connects to the same Wi-Fi network as your smart light will use. This step matters because your phone and bulb must communicate through the same connection. Check your Wi-Fi settings to confirm you’re on a 2.4 GHz network, not 5 GHz.
Watch your bulb carefully during this step. If it blinks rapidly, your bulb is in EZ mode and actively searching for your network. The app should detect it within 30 to 60 seconds. Wait patiently without interrupting the process.
If the app doesn’t find your bulb after two minutes, don’t panic. Let the app timeout completely before trying anything else. This prevents connection conflicts that cause continued red flashing.
Once your app detects the bulb, enter your Wi-Fi password when prompted. Type carefully because incorrect passwords prevent successful connection. Double check for capital letters and numbers.
After you enter your password, the app will attempt to connect your bulb to the network. Your bulb may flash different colors during this process. This is normal behavior and means the bulb is receiving new information.
When the connection succeeds, your bulb will stop flashing red. It may turn solid white, blue, or green depending on your device model. Your app will show a confirmation message that the bulb is now connected.
Test your connection by controlling the bulb through the app. Turn it on and off a few times. If your bulb responds immediately to commands, the reconnection worked successfully.
If red flashing returns after this process, try switching to AP mode. Repeat these steps but select AP mode in your app settings instead of EZ mode.
Wi-Fi Compatibility Checks You Shouldn’t Skip
Your Wi-Fi network setup is often the culprit behind persistent red flashing. Smart lights require specific conditions to connect properly, and skipping these checks wastes your time during setup.
Check your Wi-Fi frequency first. Most smart lights only support 2.4 GHz networks. If your router broadcasts on 5 GHz, your bulb cannot connect. Look at your router settings to confirm which frequency you’re using. Many modern routers split into dual bands, so your phone might connect to 5 GHz while your bulb searches for 2.4 GHz. This mismatch causes the red flashing to continue indefinitely.
Verify your network name and password are correct. Write down your Wi-Fi credentials before starting setup. Typos during password entry are surprisingly common. Your bulb will keep flashing red if the credentials don’t match exactly.
Check your router’s signal strength in the room where you’re setting up. Smart lights need decent signal to pair successfully. If you’re too far from your router, the bulb struggles to establish connection. Move closer to your router during the pairing process. Once connected, you can place the bulb anywhere within range.
Disable any network security features temporarily. Some routers use MAC filtering or require device approval before connection. Check if your router has these settings enabled. Temporarily turning them off helps identify whether security settings block your bulb.
Restart your router completely. Unplug it for 30 seconds, then plug it back in. This clears temporary connection issues that prevent new devices from pairing. Wait for your router to fully restart before attempting to connect your bulb again.
Finally, confirm no other devices are experiencing connection problems. If your phone drops Wi-Fi frequently, your bulb will too. Test your network stability first. These compatibility checks save significant frustration and reveal the actual cause of your red flashing issue.
Common Mistakes That Cause Setup to Fail
Many people make simple errors during smart light setup that cause the red flashing to persist. Understanding these mistakes helps you avoid them.
Attempting connection on 5 GHz networks is the most common error. Your smart light only works with 2.4 GHz frequencies. Check your router settings to confirm you’re using the correct band. Some routers broadcast both frequencies simultaneously, so your phone might connect to 5 GHz while your bulb cannot.
Not deleting the bulb from all linked apps before factory reset creates major problems. Your device stays registered in the old app even after reset. This causes connection conflicts when you try to pair it again. Always remove the bulb completely from every app on your phone before attempting a fresh setup.
Switching pairing modes too quickly ruins the connection process. Each mode (EZ mode and AP mode) requires time to search for your device. If you switch modes before your app finishes searching, the connection attempt fails. Wait at least two minutes between mode changes.
Ignoring the difference between rapid and slow blinking causes confusion. Rapid blinking means your light is in EZ mode. Slow blinking indicates AP mode. Using the wrong mode for your app’s requirements prevents successful pairing.
Restarting your app or phone during setup interrupts the connection. Let the entire process complete without stopping. Close other apps running in the background. They consume bandwidth and interfere with pairing signals.
Forgetting to verify your Wi-Fi password creates invisible obstacles. A single wrong character prevents connection. Type your password slowly and double check it before submitting.
These mistakes are easy to fix once you recognize them. Taking your time and following each step carefully prevents most red flashing issues during setup.
Troubleshooting Persistent Red Flashing Issues
When your smart light keeps flashing red after you’ve tried the basic steps, you need a systematic approach. Persistent red flashing means your device isn’t connecting to Wi-Fi or recognizing the app’s commands.
Start by performing a complete device reset. Unplug the bulb from power and wait 30 seconds. Hold down the physical power button for 10 seconds while unplugged. This clears any corrupted connection data stuck in the device’s memory.
Next, delete the bulb from every app where it appears. Check your phone for any smart home apps you’ve used. Remove the device from each one completely. This prevents old pairing information from interfering with your new setup attempt.
The pairing mode you’re using matters greatly. Rapid blinking indicates EZ mode, which works best in most homes. Slow blinking shows AP mode, which you should try if EZ mode fails repeatedly. Wait for your app to timeout completely before switching modes. Changing too quickly confuses the device and restarts the flashing cycle.
Check your Wi-Fi router settings carefully. Your network must broadcast on 2.4 GHz frequency. Many newer routers split their signal between 2.4 GHz and 5 GHz. Your smart light cannot connect to 5 GHz bands. If your router combines both frequencies under one name, you may need to separate them in your router’s settings.
Verify your Wi-Fi password is entered correctly during setup. A single wrong character stops the connection process immediately. Move closer to your router while setting up. Smart lights need strong signal strength to pair successfully.
If red flashing continues after these steps, restart your router completely. Unplug it for 30 seconds and plug it back in. This refreshes your network and often resolves stubborn connection issues that affect multiple devices.
Final Thoughts
Red flashing lights feel frustrating, but they rarely mean your device is broken. In most cases, this issue points to a simple connectivity hiccup. You can fix it with patience and the right approach.
Start with the basics every time. Check your Wi-Fi frequency first. Confirm your device is fully reset before trying again.
Small mistakes cause big headaches during setup. Rushing through pairing modes or skipping the app deletion step often leads to repeated failures. Slow down and follow each step in order.
Remember that EZ mode and AP mode serve different purposes. Give each mode enough time to work before switching to the other. Your patience during this process pays off.
Your network plays a huge role in successful setup. Smart lights depend on stable 2.4 GHz connections to communicate properly. Weak signals or wrong frequencies cause most flashing problems.
If you have tried everything and the light still flashes, do not panic. Sometimes a factory reset combined with a full router restart solves stubborn issues. This combination fixes many hidden problems that single fixes miss.
Keep your smartphone app updated too. Older app versions sometimes struggle to communicate with newer smart light firmware. A quick update can resolve mysterious connection failures.
Think of this troubleshooting process as a checklist. Work through each item systematically instead of jumping around randomly. This method saves time and reduces frustration.
Most smart light setup problems have straightforward solutions. Red flashing simply signals a communication issue, not permanent damage. With the right steps, your lights will connect successfully.
Take a breath, follow these guidelines, and give your device the time it needs. Your smart home setup will be running smoothly before you know it. Success is just a few careful steps away.
Frequently Asked Questions
Why is my smart light flashing red if it’s brand new?
Red flashing during setup means your bulb cannot connect to your Wi-Fi network. This is not a sign of a broken device. The bulb is working correctly and sending a signal that it needs help pairing. Check that your Wi-Fi network runs on 2.4 GHz, since smart lights do not support 5 GHz frequencies.
What’s the difference between rapid blinking and slow blinking?
Rapid blinking means your bulb is in EZ mode. Slow blinking means it is in AP mode. Each mode connects differently to your network. EZ mode works best for most home setups and connects faster. If rapid blinking does not work after a few minutes, switch to AP mode by checking your app settings.
Should I delete my bulb from the app before trying again?
Yes, absolutely. Before you attempt a factory reset or reconnection, remove the bulb from every app where it appears. Leaving it linked to old apps creates confusion during setup. Once you delete it completely, your app can search for a fresh connection. This simple step fixes many red flashing problems.
Can I switch pairing modes immediately if the first one fails?
No, wait for your app to finish searching. Most apps search for 30 to 60 seconds before timing out. Switching modes too fast interrupts this process and causes the flashing to continue. Let the app timeout on its own, then change modes and try again.
Does red flashing mean my bulb is dying?
Not at all. Red flashing only signals a connectivity problem during setup. Your bulb has plenty of power. Focus on your Wi-Fi settings and pairing mode instead of worrying about hardware failure.