How to Connect Smart Lights to Dual-Band Wi-Fi Routers Easily?
Smart lights make your home feel modern and fun. But sometimes, they refuse to connect to your Wi-Fi. This problem often happens because of dual-band routers.
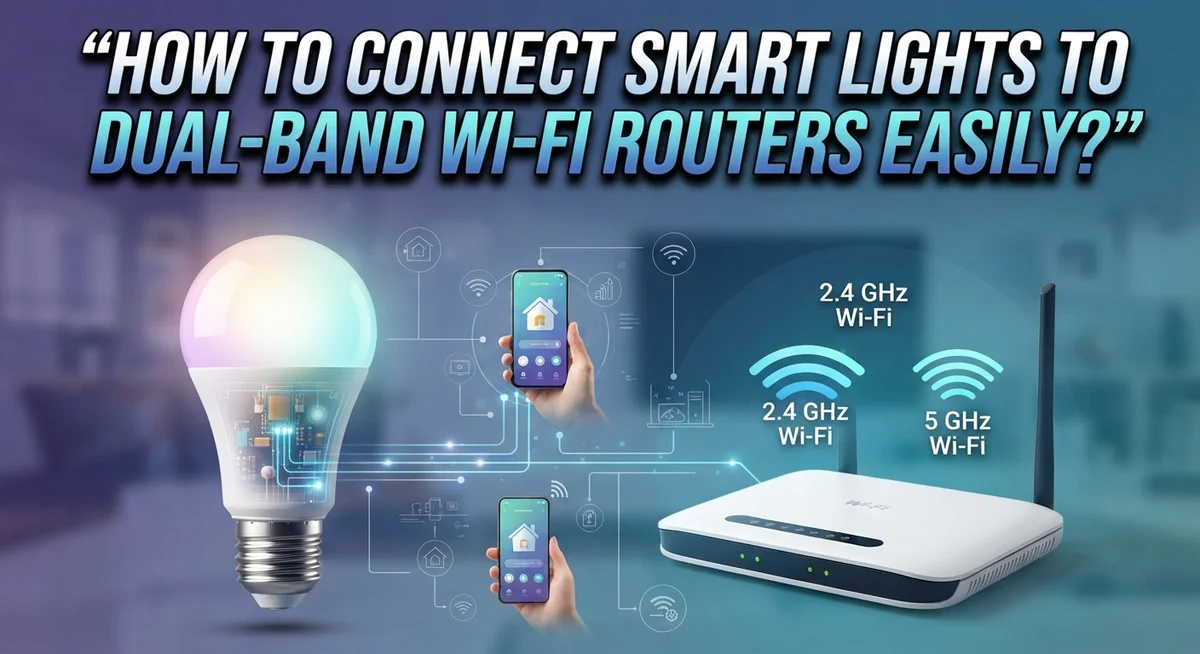
Most smart bulbs only work on the 2.4GHz band. Your router, though, broadcasts both 2.4GHz and 5GHz signals at once. If your phone connects to the wrong band, your bulb simply won’t show up in the app.
The good news? This fix is simple once you know the steps.
In this guide, we will show you how to connect smart lights to dual band routers easily. You will learn how to enable the right band, connect your phone correctly, and pair your bulb using its app.
In a Nutshell
- Use the 2.4GHz band only. Smart bulbs cannot detect or connect to 5GHz networks. Your router must broadcast 2.4GHz for setup to work.
- Check your router settings first. Most dual band routers enable 2.4GHz by default. If yours has separate SSIDs, pick the 2.4GHz one.
- Connect your phone to 2.4GHz too. Your phone needs to match the bulb’s band during pairing. This step trips up many people.
- Open your smart light app to pair. Select the bulb option in the app and follow the prompts. The app will guide you through the rest.
- Control your lights from any network after setup. Once paired, you can switch to 5GHz or even use cellular data. The 2.4GHz requirement only applies during initial pairing.
- Don’t worry about network speed. Using 2.4GHz for your bulbs will not slow down your other devices. It has minimal impact on modern routers.
Why Smart Bulbs Need 2.4GHz Wi-Fi
Smart bulbs operate on older wireless technology that only supports the 2.4GHz frequency band. Your dual band router broadcasts two separate networks at the same time: one at 2.4GHz and another at 5GHz. This is why understanding the difference matters for your setup.
The 2.4GHz band has a longer range and better wall penetration than 5GHz. This older frequency works well for devices that don’t need high speed, like smart bulbs. Your bulbs use minimal data anyway, so they fit perfectly on this band.
5GHz networks are faster but have shorter range. Smart bulbs cannot detect or connect to 5GHz signals at all. Your router likely enables 2.4GHz automatically, but you should verify this in your router settings before attempting any pairing.
Here is the practical reason why this matters: Your phone and your bulb must connect to the same 2.4GHz network during the initial pairing process. If your phone is on 5GHz while your bulb searches for 2.4GHz, they will never find each other. The app won’t detect your bulb, and the pairing will fail.
After you complete the pairing on 2.4GHz, something interesting happens. Your bulbs stay connected to the 2.4GHz band, but you can control them from any device on any band. You could switch your phone to 5GHz or even use cellular data, and your lights will still respond to commands.
This separation between setup and control is important to understand. The initial connection requires 2.4GHz, but ongoing control does not. This design lets you use fast 5GHz for your other devices while keeping your smart bulbs on a reliable, lower frequency band.
Understanding Dual-Band Routers and How They Work
A dual band router broadcasts two Wi-Fi signals at the same time. One signal runs on 2.4GHz and the other on 5GHz. Think of it like having two radio stations playing from the same device.
The 2.4GHz band travels farther and passes through walls better. It moves slower but reaches more places in your home. The 5GHz band moves much faster but doesn’t travel as far. It works best when your device sits close to the router.
Your dual band router sends both signals constantly. Your phone, computer, and other devices can pick whichever signal they want. Most modern routers let you give each band a different name, or they use one combined name that your devices automatically split.
Here’s what matters for smart lights: they only listen to the 2.4GHz signal. Your router must have the 2.4GHz band turned on. Most routers enable this by default, but some older models might not.
When you set up a smart bulb, your phone must connect to the same 2.4GHz band as the bulb. Once pairing finishes, something shifts. Your phone can switch to 5GHz or even use cellular data, and the bulb still responds. The connection stays active because the bulb remains on 2.4GHz in the background.
This setup actually helps your network. Your faster devices use 5GHz while your smart bulbs use 2.4GHz. Everything runs smoothly without crowding one band.
Understanding this split between setup and control prevents frustration. You now know why your phone needs to match the bulb during pairing, but can switch afterward.
Preparing Your Router: Enabling and Configuring the 2.4GHz Band
Your router likely has the 2.4GHz band enabled already. Most dual band routers activate both frequencies by default. Still, you should verify this setting to avoid connection problems later.
Start by accessing your router’s admin panel. Open a web browser and type your router’s IP address (usually 192.168.1.1 or 192.168.0.1). Enter your login credentials. The default username and password are often “Admin” and “Admin,” though yours may differ based on your router model.
Once logged in, look for wireless settings or Wi-Fi configuration options. Find the section labeled “2.4GHz Band” or “802.11b/g/n.” Check the box that says “Enable” if it appears unchecked. This activates the 2.4GHz signal that your smart bulbs need.
Next, consider your network naming strategy. You have two options: keep both bands under one network name (SSID), or create separate names for each band. Separate SSIDs make setup easier because your phone won’t accidentally connect to 5GHz during pairing. If you choose separate names, create one like “YourNetwork 2.4GHz” and another like “YourNetwork 5GHz.”
After enabling 2.4GHz, save your changes. Your router will restart, which takes one to two minutes. Don’t unplug it during this process.
Finally, write down your 2.4GHz network name and password. You’ll need these details when pairing your smart bulbs. Keep this information handy before you start the app based setup process.
This preparation step prevents frustration and ensures smooth bulb connection later.
Step-by-Step Guide to Connecting Smart Lights via App
Open your smart light manufacturer’s app on your phone. This is your control center for the entire setup process. Most apps have a clear button to add a new device or bulb.
Make sure your phone is connected to the 2.4GHz band of your dual-band router before you start. You can verify this in your phone’s Wi-Fi settings. Look for your router’s 2.4GHz network name, which often ends with “2.4G” or “24G” to distinguish it from the 5GHz version.
Tap the option to add a new smart light in the app. You’ll usually see buttons labeled “Add Device,” “Pair Bulb,” or “Smart Bulb.” Select the smart light option from the available device types.
The app will search for your bulb. Make sure your smart light is powered on and within range of your router. The bulb typically blinks or shows a light pattern when it’s ready to pair.
When the app finds your bulb, select it from the list. Enter your 2.4GHz network name and password into the app. Double check that you’re using the 2.4GHz credentials, not the 5GHz ones.
Wait for the connection to complete. This usually takes 30 to 60 seconds. You’ll see a confirmation message when pairing succeeds.
Once paired, your bulb appears in the app’s main dashboard. You can now control it from this screen. Test the connection by turning the light on and off through the app to confirm everything works properly.
Helpful Tips for a Smooth Setup Process
Start by checking that your phone stays connected to the 2.4GHz band throughout the entire setup. Many people switch networks mid-process, which breaks the pairing connection. Keep your phone on 2.4GHz until the app confirms your bulb is fully paired.
Position your bulb within 10 to 15 feet of your router during setup. Smart lights have shorter wireless range than phones or laptops. Moving the bulb closer ensures a strong connection signal while pairing happens.
Give the app time to search for your bulb. Don’t tap the search button repeatedly or restart the app. Let it scan for 30 to 60 seconds before troubleshooting. Impatience here causes failed connections.
If pairing fails, restart your bulb by turning it off for 10 seconds, then back on. This resets the bulb’s wireless connection. Return to the app and try pairing again.
Verify your router’s 2.4GHz band is actually enabled before you start. Some people assume it’s on when it isn’t. Log into your router settings and confirm both bands are broadcasting.
Keep your router’s admin password and network credentials nearby. You may need them if connection issues arise. Write down your 2.4GHz network name and password on paper for quick reference.
Avoid connecting other devices to your 2.4GHz network during setup. Too much traffic on that band can interrupt the pairing process. Wait until your bulb connects successfully before adding other smart devices.
Close other apps on your phone that use Wi-Fi, like streaming services or cloud backup programs. These compete for bandwidth and can slow down the pairing process significantly.
Common Mistakes That Prevent Successful Pairing
The most common error is attempting to connect your smart bulb to the 5GHz band. Smart bulbs simply cannot detect 5GHz signals. Your phone might connect to 5GHz just fine, but your bulb will never find that network. Always use the 2.4GHz band for pairing.
Another frequent mistake is assuming your 2.4GHz band is already enabled. Some users skip this verification step entirely. Check your router settings before you start. Log into your router’s admin panel and confirm the 2.4GHz band is active. This single verification prevents hours of troubleshooting later.
Connecting your phone to the wrong band during setup causes major frustration. Your phone needs to be on the same 2.4GHz network as your bulb. If your phone connects to 5GHz instead, the app cannot find your bulb. Double check your phone’s Wi-Fi settings before opening the manufacturer’s app.
Many people also make the mistake of using combined SSIDs. When your router broadcasts both bands under one network name, your phone might randomly jump between frequencies. Separating your SSIDs makes setup much simpler. This way, you control exactly which band your phone uses.
Rushing the pairing process is another problem. People repeatedly tap the search button or restart the app when nothing happens immediately. Give the app 30 to 60 seconds to locate your bulb. Patience matters here.
Finally, some users forget to restart their bulb after a failed attempt. Power off your bulb for 10 seconds, then power it back on. This simple reset clears connection errors and prepares the bulb for another pairing attempt.
Troubleshooting Connection Issues
When your smart lights won’t connect to your dual band router, the issue usually falls into one of a few categories. The most common problem is attempting connection on the 5GHz band. Smart bulbs simply don’t support 5GHz frequencies. They only work on 2.4GHz. If your phone connects to 5GHz while you’re setting up, your bulb won’t appear in the app search results.
Check your router settings immediately. Log into your router’s admin panel using your credentials. Navigate to wireless settings and confirm the 2.4GHz band is actually enabled. Many users assume it’s on by default, but some configurations disable it. Enable it if needed and save your changes.
Distance matters more than people realize. Move your bulb closer to your router during setup, ideally within 10 to 15 feet. Walls and obstacles weaken the signal significantly. Once pairing completes successfully, you can move the bulb anywhere in your home.
If the app still can’t find your bulb, try a hard reset. Turn off the bulb completely for 10 seconds, then turn it back on. This clears any failed connection attempts from the bulb’s memory. Wait 30 seconds before searching again in your app.
Verify your phone is on the correct network band before starting. Check your phone’s Wi-Fi settings and confirm it shows the 2.4GHz network name. Some routers combine both bands under one name, which creates confusion.
Avoid connecting multiple devices simultaneously. Disconnect other devices from 2.4GHz temporarily. This reduces interference and gives your bulb a clearer path to connect. Once your light pairs successfully, add other devices back to your network.
Using Smart Lights Across Different Bands After Setup
Once your smart lights pair successfully on the 2.4GHz band, you gain flexibility in how you control them. Your bulbs stay connected to the 2.4GHz network, but your control devices can operate on different bands.
Here’s how this works in practice. Your phone or tablet can switch to the 5GHz band after setup completes. The 5GHz connection offers faster speeds for streaming and browsing. Your smart lights continue communicating through 2.4GHz without any interruption. The two bands operate independently on your dual band router.
You can also control your lights from devices using cellular data. Once pairing finishes, your bulbs register in the manufacturer’s cloud system. This means you control them remotely even when away from home. Your phone doesn’t need to stay on the same network band anymore.
Managing multiple bands becomes simple with separate SSIDs. If your router broadcasts distinct network names for each band, you know exactly which one to select. Your phone connects to “NetworkName 5GHz” for faster performance. Your bulbs stay linked to “NetworkName 2.4GHz” automatically.
Some routers combine both bands under one SSID. This setup works fine too. Your router automatically assigns devices to the appropriate band based on signal strength and compatibility.
The key advantage is flexibility without complexity. You don’t sacrifice network speed by adding smart lights. Your faster devices enjoy 5GHz performance. Your smart bulbs maintain their reliable 2.4GHz connection. Everything operates smoothly in the background.
After initial setup, you rarely think about bands again. Your lights respond instantly to commands from any device. Control happens through the app or voice commands regardless of which band your phone uses. This seamless experience is exactly what dual band routers provide.
Final Thoughts
Connecting smart lights to a dual band router is simple once you know the basics. The 2.4GHz band is your key requirement for pairing any smart bulb.
Remember that smart bulbs need this specific band during setup. Your router likely broadcasts it already, so enabling it takes just a few clicks in your settings.
After pairing succeeds, your smart lights work smoothly with any device. Your phone can move freely between bands, and cellular data works fine too.
The setup process itself takes only minutes when you follow the right order. Connect your phone to 2.4GHz first, then open your bulb’s app to begin pairing.
Patience matters more than technical skill here. Most connection problems come from simple oversights, not complicated router issues.
Double check your band settings before you start. This single step prevents most common frustrations people face.
Keep your devices close to the router during initial setup. This small habit makes the pairing process faster and more reliable.
Smart lighting technology continues to improve every year. Newer bulbs and routers work together more smoothly than ever before.
Once you understand how bands work, you can add more smart devices with confidence. The same basic principles apply across different brands and models.
Your network stays fast and reliable even with multiple smart lights connected. Modern routers handle this extra load without any noticeable slowdown.
Smart home setup doesn’t have to feel technical or stressful. With the right band selected and a bit of patience, your lights will connect smoothly.
Take your time, follow each step carefully, and enjoy your new smart lighting system without unnecessary hassle.
Frequently Asked Questions
Why won’t my smart bulb connect to my dual band router?
Smart bulbs only work on the 2.4GHz band. Your router broadcasts both 2.4GHz and 5GHz at the same time. If you try connecting on 5GHz, the bulb simply won’t see the network. Check your router settings to confirm 2.4GHz is enabled. Most dual band routers have this feature turned on by default, but it’s worth verifying in your admin panel.
Can I control my smart lights from a 5GHz device after setup?
Yes, absolutely. Once your bulb pairs successfully on 2.4GHz, you gain full flexibility. Your phone can switch to 5GHz after the initial setup completes. You can also control your lights using cellular data on your phone. The bulb stays connected to 2.4GHz in the background while your other devices use faster 5GHz speeds.
Does connecting smart lights to 2.4GHz slow down my internet?
No, it won’t cause noticeable slowdowns. Modern routers handle both bands independently. Smart bulbs use minimal bandwidth since they only transmit simple on/off commands and brightness levels. Your network speed remains fast for streaming, gaming, and other activities on the 5GHz band.
What’s the most common mistake people make during setup?
The biggest error is connecting your phone to the wrong band during pairing. You must connect your phone to 2.4GHz before opening the manufacturer app. Many people stay on 5GHz without realizing it, then wonder why the app can’t find their bulb. Double check your connected network name before you begin.
Should I use separate network names for each band?
It helps significantly. If your router lets you create separate SSIDs for 2.4GHz and 5GHz, do it. This makes setup clearer since you’ll see exactly which band you’re joining. Some routers combine both bands under one name, which works fine too, but separate names remove confusion during the pairing process.