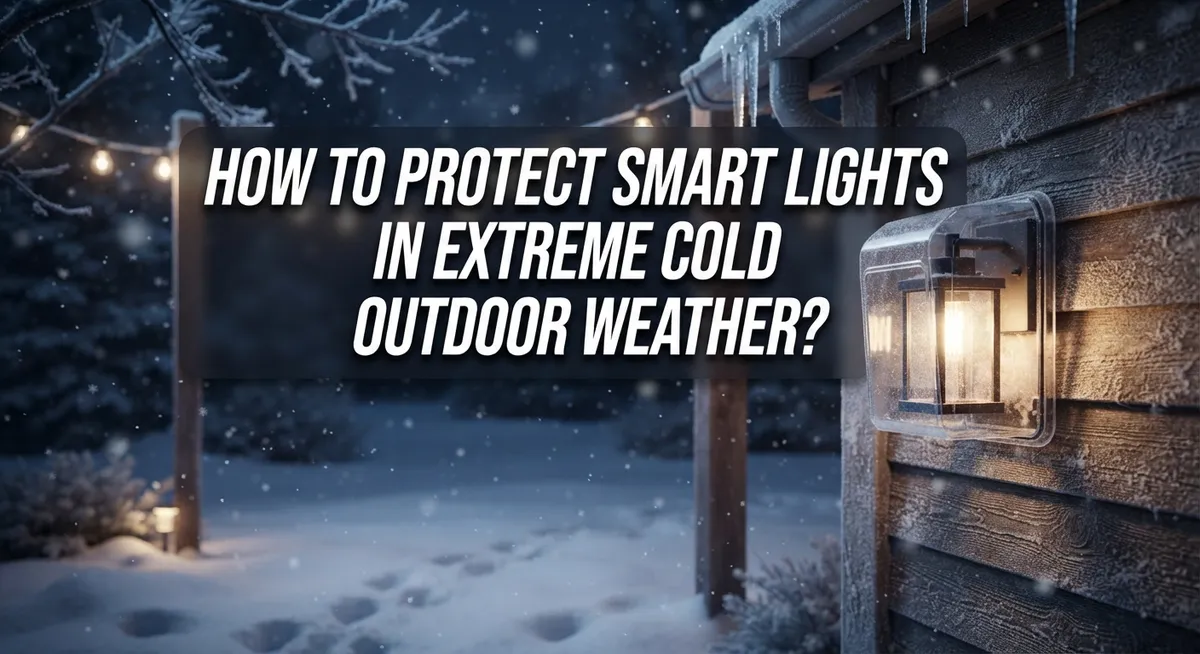
How to Protect Smart Lights in Extreme Cold Outdoor Weather?
Winter can turn your smart lights into a real problem. Freezing temperatures affect how bulbs work outdoors. Many smart lights struggle when the mercury drops below zero.
Your smart lights might flicker or stop working in extreme cold. Some bulbs only work down to -4°F. Below that point, performance drops fast.
Cold weather also affects the materials in your fixtures. Plastic can crack. Seals can fail. Water can seep in and cause damage.
This article covers everything you need to know. We will look at how cold impacts smart lights. You will learn what temperature ratings actually mean.
We also cover the best setup methods for outdoor lights. This includes proper mounting and safe wiring choices.
Finally, we share simple maintenance tips. These steps help your lights survive winter and work well year after year.
By the end, you will know how to protect your smart lights from extreme cold. Your outdoor lighting can stay bright and safe all season long.
In a Nutshell
- Check temperature ratings before you buy or install any smart light outdoors. Some bulbs only work down to -4°F, so know your local climate first.
- Pick weatherproof fixtures with an IP67 rating. This keeps water and ice out of the wiring and bulb housing.
- Use outdoor rated outlets and extension cords. Indoor cords crack easily in freezing temperatures.
- Mount lights with clips or adhesive. Nails and staples can damage cords and let cold air seep into connections.
- Inspect and clean fixtures often during winter. Snow and ice buildup can cause bulbs to overheat or short out.
- Switch to LED bulbs if you still use traditional ones. LEDs handle cold weather much better and last longer outdoors.
Why Extreme Cold Affects Smart Lights
Extreme cold impacts smart lights in several ways. Battery powered bulbs lose charge faster when temperatures drop. The chemical reactions inside batteries slow down, reducing power output and brightness.
Electronic components inside smart bulbs become less responsive in freezing conditions. Wireless signals travel slower through cold air. Your phone may struggle to connect to lights that sit outside in sub zero temperatures.
Metal and plastic materials contract when exposed to extreme cold. This causes internal connections to loosen. Solder joints may crack. Wiring can separate from circuit boards. These physical changes interrupt power flow to the LED elements.
Moisture presents another serious problem. When cold air meets warm surfaces, condensation forms inside fixtures. This water freezes solid and blocks electrical pathways. Ice buildup can short circuit the entire system.
Battery powered smart lights suffer most in extreme cold. Traditional alkaline batteries fail rapidly below freezing. Rechargeable batteries lose up to 50 percent capacity in very cold weather. Some bulbs simply won’t turn on until they warm up indoors.
Temperature ratings matter significantly. Many standard smart bulbs operate only down to minus 4 degrees Fahrenheit. If your area gets colder, those bulbs will stop working regardless of how well you protect them. Extreme cold below zero may exceed what manufacturers designed their products to handle.
LED technology performs better than older incandescent or halogen bulbs in cold weather. LEDs generate less heat and tolerate temperature swings more effectively. They also use less power, which helps battery operated lights last longer outdoors.
The combination of cold, moisture, and material contraction creates a perfect storm for smart light failure. Understanding these effects helps you choose appropriate fixtures and protection methods. Knowing why cold damages lights guides better installation and maintenance decisions.
Checking Temperature Ratings and Weatherproof Certifications
Temperature ratings tell you the lowest temperature where your smart lights work safely. Manufacturers test their products and list these limits in the specifications. You need to check this number before buying or installing anything outdoors.
Most smart bulbs have temperature ratings between 0°F and 50°F. Some models work down to minus 4°F, while others stop functioning at 32°F. If your area gets colder than the rated temperature, the lights may flicker, dim, or stop working entirely.
Weatherproof certifications matter just as much as temperature ratings. Look for the IP rating on the product label. IP67 means the fixture resists water and dust effectively. IP65 also works well for outdoor use. These numbers indicate how protected your lights are from moisture, which combines dangerously with cold.
Check if the housing uses corrosion resistant materials. Metal fixtures need protective coatings to prevent rust when exposed to freezing rain and snow. Plastic housings should resist UV damage and cracking in cold temperatures.
Read the manufacturer’s specifications carefully. Don’t assume all outdoor lights handle extreme cold equally. A fixture rated for mild winters may fail during harsh freezes. Compare the temperature rating to your local winter conditions.
Verify the certification matches your climate zone. If temperatures regularly drop below zero in your area, you need lights rated for those extremes. Standard outdoor fixtures often aren’t enough for severe cold regions.
Check both the bulb and the fixture separately. Sometimes the housing is weatherproof, but the bulb inside has a higher temperature limit. You need both components to meet your cold weather requirements.
Keep documentation from your purchase. Save the specification sheets showing temperature ratings and weatherproof certifications. This information helps when troubleshooting problems or planning replacements during winter months.
Choosing Cold-Resistant Fixtures and Bulb Types
Smart lights need special consideration when you live in freezing climates. Not all outdoor fixtures handle extreme cold equally well. Start by understanding what temperature range your specific bulbs and fixtures support.
Most manufacturers list temperature ratings in their product documentation. These numbers tell you the coldest temperature where your system operates safely. If your area experiences temperatures below these ratings, the lights may fail or perform poorly.
Look for fixtures with an IP67 rating or higher. This waterproof standard means the housing protects internal components from moisture and cold damage. Sealed fixtures work better than open designs because they trap warm air and prevent ice buildup inside the unit.
The housing material matters significantly for cold performance. Corrosion resistant metals like aluminum or stainless steel withstand freezing better than standard plastic. Check the product label to see what materials the manufacturer used.
LED bulbs outperform traditional incandescent or halogen options in freezing conditions. LEDs generate less heat, so they don’t suffer thermal shock when exposed to extreme temperature swings. They also draw less power, reducing strain on outdoor circuits during winter.
Battery powered smart lights present a special challenge in extreme cold. Alkaline batteries lose effectiveness rapidly below freezing. If your lights use batteries, consider switching to hardwired models or replacing batteries more frequently during winter months.
Before purchasing any outdoor smart light system, verify that both the bulb and fixture ratings match your climate zone. Compare the manufacturer’s minimum temperature specification against your area’s typical winter lows. If your region experiences temperatures below zero, you may need commercial grade equipment rated for those extremes.
Take time to read the complete specifications. Don’t assume outdoor rated lights work in your specific climate. This simple verification step prevents costly failures and keeps your system running reliably through the coldest months.
Step-by-Step Installation for Winter Durability
Before winter arrives, prepare your smart light system with these practical steps. Start by gathering your materials: outdoor rated extension cords, weatherproof outlet covers, mounting clips designed for cold climates, and silicone sealant. These items protect your installation from freeze damage.
First, inspect every component of your existing system. Check all connections for loose wires or corrosion. Test each light to confirm it powers on correctly. Look for any cracks in the fixture housing or bulb covering. Replace damaged parts before cold weather arrives.
Next, choose your mounting method carefully. Use adhesive strips or mounting clips rated for outdoor use. Avoid nails or staples that pierce the fixture casing. These holes allow moisture to seep inside, causing short circuits when temperatures drop.
Install fixtures in locations that receive good air circulation. Avoid enclosed spaces where condensation builds up. Position lights away from areas where snow and ice accumulate heavily. Heat from the fixture helps melt ice before it hardens around the casing.
Secure all electrical connections with weatherproof covers. Use outdoor rated extension cords that handle cold temperatures. Coil excess cord loosely to prevent stress on connections. Keep power sources away from standing water or snow melt.
Replace your bulbs with cold rated LED options before winter. LED bulbs maintain brightness better than traditional bulbs in freezing conditions. Verify that your new bulbs match your fixture’s voltage and connector type.
Test your entire system one final time before severe weather hits. Turn on each light and observe for flickering or dimming. Check that all connections remain tight. Document which lights work properly so you can identify problems quickly if issues develop.
Schedule regular maintenance checks throughout winter. Clear snow and ice buildup from fixtures every few weeks. Inspect connections after extreme weather events. This preventive approach keeps your outdoor lighting system running reliably all season long.
Seasonal Maintenance Practices for Cold Climates
Cold weather maintenance keeps your smart lights working all season long. Start by cleaning your fixtures every two weeks during winter. Ice buildup and frost reduce light output and can damage internal components.
Check all connections monthly to catch problems early. Look for corrosion on metal parts and tighten any loose wires. Moisture freezes in small gaps and causes electrical failures.
Replace weatherstripping around fixture seals if you notice cracks or gaps. Cold air leaks into the housing and damages circuit boards. New weatherstripping costs little but prevents expensive repairs.
Test your system after major temperature drops. Extreme cold can weaken battery connections in wireless smart lights. Replace batteries with fresh ones rated for cold temperatures if your system uses them.
Clear snow and ice from fixture covers regularly. Heavy buildup blocks light output and adds weight that stresses mounting hardware. Use a soft brush instead of sharp tools that scratch protective coatings.
Inspect mounting hardware every month. Freeze and thaw cycles loosen bolts and brackets. Tighten everything securely to prevent fixtures from falling.
Check your electrical circuit for overload. Cold temperatures reduce efficiency, so your system draws more power. Avoid plugging multiple outdoor devices into the same outlet.
Keep spare bulbs and fuses on hand. Cold weather failures often happen during storms when you can’t easily get replacements. Store backups indoors in a dry location.
Reduce usage during extreme cold snaps below your system’s temperature rating. Most smart lights slow down or stop responding when temperatures drop too far. Give your system breaks during the coldest periods to extend its lifespan.
Document your maintenance schedule. Write down when you cleaned, inspected, and tested each component. This record helps you spot patterns and plan ahead for next winter.
Common Mistakes That Damage Smart Lights in Winter
Smart lights fail in winter because people make preventable mistakes. Understanding these errors helps you keep your outdoor lighting working all season.
Using indoor rated lights outdoors is the biggest mistake. Indoor fixtures lack weatherproofing. They cannot handle cold temperatures, moisture, or snow. Always check if your bulbs and fixtures say “outdoor rated” before installation.
Ignoring temperature ratings causes system failures. Manufacturers list specific cold limits. If your area drops below a light’s rating, the system stops working. Check your local winter temperatures against the product specs. This simple step prevents disappointment.
Poor mounting methods damage fixtures fast. Driving nails or staples through light housings creates entry points for water and ice. Moisture seeps inside and freezes, breaking internal components. Use clips or adhesive designed for outdoor fixtures instead.
Removing delicate fixtures without replacements leaves gaps. When you take down summer lights, you expose wiring and connection points. Winter moisture finds these openings. If you must remove fixtures, install weatherproof covers over the empty spots.
Overloading electrical circuits causes dangerous failures. Cold weather makes circuit breakers more sensitive. Plugging too many lights into one outlet increases fire risk. Spread your smart lights across multiple circuits.
Neglecting regular cleaning lets ice and snow accumulate. Heavy buildup damages mounting hardware and seals. Inspect fixtures monthly and clear debris. This prevents structural stress from ice weight.
Forgetting to switch to LED bulbs wastes energy in cold. Traditional bulbs perform poorly below freezing and drain batteries faster. LED bulbs maintain brightness and efficiency in extreme cold.
Skipping pre winter inspections means discovering problems during storms. Check all connections, seals, and hardware before temperatures drop. Fix issues now instead of in the middle of winter.
These mistakes are easy to avoid with planning and attention.
Troubleshooting Smart Lights That Stop Working in Cold Weather
Smart lights stop working in cold weather for specific reasons. Understanding these causes helps you fix problems quickly and prevent future failures.
Battery drain happens fast in freezing temperatures. Cold reduces battery capacity significantly. A battery showing 50% charge at room temperature may show 10% charge outdoors. Your smart light loses power even though the battery isn’t actually dead. Bring the light inside to warm up, and the battery percentage rises again. This is normal behavior, not permanent damage.
Connection failures occur when metal parts contract. Cold causes metal to shrink slightly. This shrinkage creates tiny gaps between connections inside your fixtures. Loose connections interrupt power flow to your bulbs. Check all wire connections and tighten them firmly. Make sure weatherproof caps seal all exposed terminals properly.
Firmware freezes happen in extreme cold. The smart chip inside your bulb processes commands slowly when temperatures drop below freezing. Your app may show the light as offline even though it still works. Wait a few minutes for the system to respond. If the light remains unresponsive, restart it by turning the power off for 30 seconds, then back on.
Condensation builds inside sealed fixtures. Temperature changes create moisture inside your light housing. This water can short circuit internal components. Verify your fixture seals are intact. If you see water droplets inside, the weatherproof seal has failed and needs replacement.
LED bulbs fail less often than other types. Traditional bulbs struggle in extreme cold. LEDs perform much better because they generate less heat and tolerate lower temperatures. If your light keeps failing, switching to cold rated LED bulbs often solves the problem.
Test each component individually to pinpoint which part failed. This systematic approach saves time and money on repairs.
Final Thoughts
Protecting your smart lights in extreme cold comes down to planning ahead. Cold weather does not forgive shortcuts. A little preparation now saves you from frustrating failures later.
Start with the basics. Pick fixtures rated for your actual climate. A light rated to -4°F will not survive a -20°F night.
Weatherproofing matters as much as the bulb itself. Look for IP67 rated housings that seal out moisture and ice. Outdoor rated outlets and cords complete the safety chain.
Installation choices matter too. Use clips or adhesive mounts instead of nails or staples. This small change protects both your fixtures and your walls.
LED bulbs remain your best defense against harsh winters. They handle cold far better than older bulb types and use less energy doing it.
Think of your smart light system as a living setup. It needs attention through the season, not just once in autumn.
Extreme cold below zero often exceeds what manufacturers test for. Always double check your product specs before the temperature drops.
Smart lights can absolutely handle winter when you set them up right. The secret lies in matching your equipment to your climate honestly.
Do not assume a bulb works everywhere just because it says outdoor rated. Ratings vary widely between products and regions.
Give your system routine care and it will reward you with reliable light through the coldest months. Skip the shortcuts and your lights will handle whatever winter throws at them.
Cold weather does not have to mean broken lights. With the right fixtures, proper installation, and honest attention to your climate, your outdoor smart lighting can shine through every frozen night.
Frequently Asked Questions
What temperature can smart lights actually handle?
Most smart light manufacturers specify operating ranges. Standard outdoor smart bulbs work down to around negative 4 degrees Fahrenheit. However, your specific model may differ. Always check your product’s temperature rating before winter arrives. Extreme cold below zero often pushes beyond what manufacturers tested. Your lights might still function, but performance drops significantly. Battery drain accelerates. Connection issues become more common. Check your manual or manufacturer website for exact specifications matching your climate.
Why do smart lights fail faster in extreme cold?
Cold affects multiple parts of your system simultaneously. Metal components contract slightly, which loosens connections. Battery capacity drops dramatically in freezing temperatures. Your smart bulb’s internal chip processes commands more slowly. Condensation can form inside sealed fixtures when temperatures fluctuate. All these factors combine to create reliability problems. LED bulbs resist cold better than traditional bulbs. However, even LEDs struggle when temperatures plummet. The issue isn’t usually the bulb itself. Poor installation and inadequate weatherproofing cause most failures.
How often should I inspect my outdoor smart lights in winter?
Inspect your system before winter starts. Check all connections, fixtures, and mounting hardware. Look for cracks, corrosion, or loose components. During winter, inspect monthly or after major weather events. Clean fixtures regularly to remove ice and snow buildup. This prevents moisture accumulation inside housings. Replace any bulbs showing reduced brightness. Test your app connection weekly to catch communication failures early. Regular maintenance catches small problems before they become system failures.
Can I leave smart lights outside year round?
Yes, but with proper setup. Use fixtures rated IP67 or higher for waterproofing. Install outdoor rated extension cords and outlets only. Mount lights securely using clips or adhesive, never nails. Avoid overloading circuits. Replace indoor bulbs with outdoor rated LEDs. The key is matching your equipment to your climate. If temperatures drop below your bulb’s rating, consider removing lights during extreme cold. This prevents damage and extends equipment life. Proper storage indoors protects your investment through the harshest months.