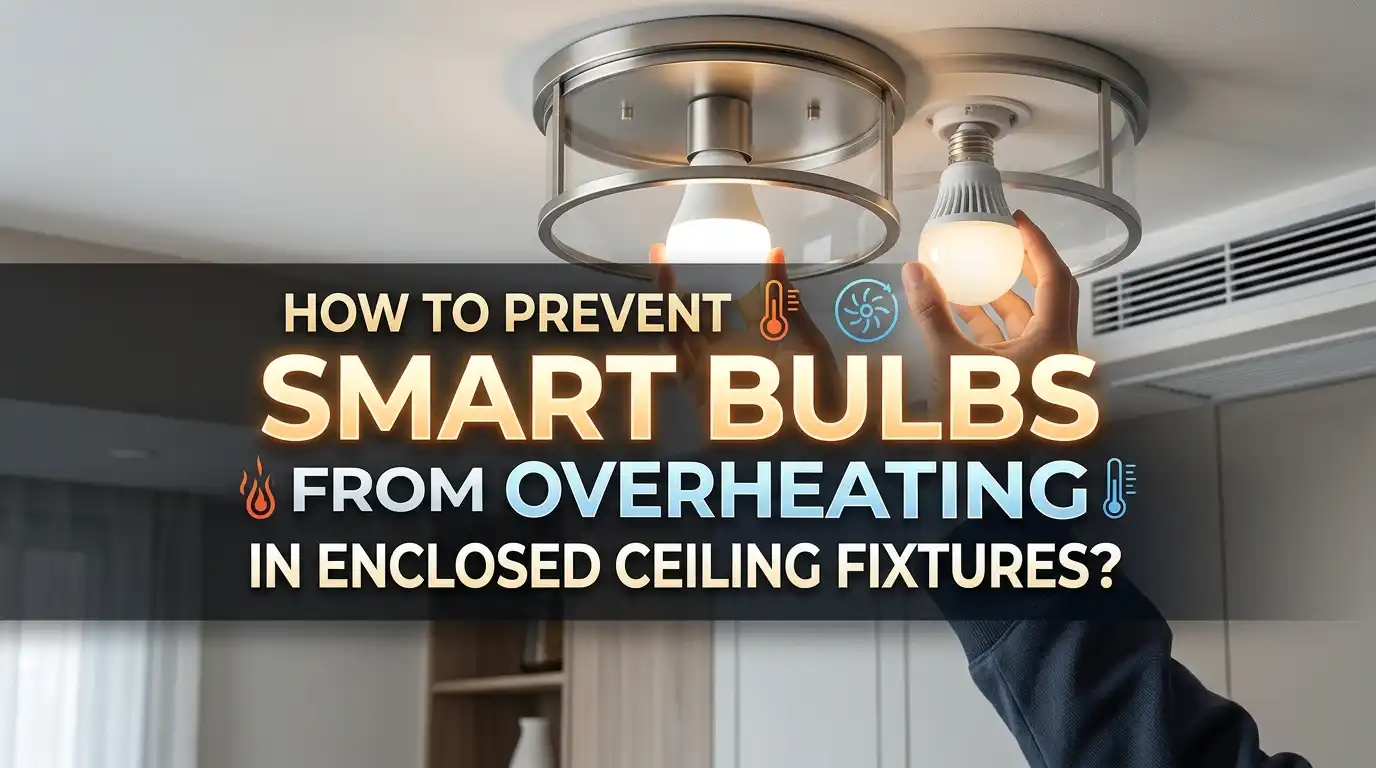
How to Prevent Smart Bulbs From Overheating in Enclosed Ceiling Fixtures?
Smart bulbs make our homes brighter and smarter. But enclosed ceiling fixtures can turn these clever devices into a real problem.
Heat has nowhere to escape in a closed dome or airtight can. This trapped heat builds up fast around your smart bulb.
The result? Overheating that can damage the bulb’s internal circuits. Your smart bulb might flicker, dim unexpectedly, or stop connecting to your app.
In worse cases, it could even become a fire risk.
This guide will show you exactly why smart bulbs overheat in enclosed fixtures. You will learn the warning signs to watch for before something goes wrong.
We will also cover simple fixes you can use right away. From choosing the right bulb type to avoiding common wiring mistakes, we have you covered.
In a Nutshell
- Choose the right bulb. Always pick smart bulbs labeled “enclosed fixture rated.” This label means the bulb can handle trapped heat safely.
- Skip old dimmers. Pairing smart bulbs with outdated dimmer switches can cause overheating. Use a smart switch instead for better control.
- Watch for warning signs. Flickering lights, burning smells, or discoloration mean trouble. These signs point to a failing LED driver inside the bulb.
- Touch test matters. If a bulb feels dangerously hot, turn it off right away. Never ignore this simple safety check.
- LEDs run cooler. Modern LED bulbs produce less heat than older incandescent or fluorescent bulbs. Still, enclosed spaces need extra care.
- Check before you install. Look at your fixture’s rating and any warning labels first. This small step prevents big problems later.
Why Enclosed Fixtures Cause Smart Bulbs to Overheat
Enclosed ceiling fixtures create a trap for heat. When you install a smart bulb inside a dome or airtight can, warm air has nowhere to go. The heat bounces back toward the bulb instead of escaping into the room.
Smart bulbs contain delicate electronic circuits in their base. These circuits control the color, brightness, and connectivity features. Heat damages these circuits over time. When temperatures rise too high, the internal driver fails. Your bulb stops working or behaves erratically.
The problem gets worse in small, cramped fixtures. Tight spaces mean less air movement around the bulb. A standard recessed can with no ventilation holes becomes especially dangerous. Even a small dome fixture can trap enough heat to cause problems.
Not all LEDs are created equal. Some bulbs have better heat management than others. A smart bulb designed for open fixtures lacks the thermal protection needed for enclosed spaces. The manufacturer did not build in extra cooling features for that bulb.
Old dimmer switches make this situation worse. Many smart bulbs cannot work safely on older dimming systems. The dimmer sends electrical signals that cause the bulb’s circuits to work harder. This extra strain generates additional heat inside an already hot fixture.
Temperature buildup happens faster than you might expect. Within minutes of turning on an unsuitable bulb, internal temperatures can exceed safe limits. The bulb’s protective components start to fail. Flickering begins. A burning smell appears.
This is why checking your fixture before installation matters so much. Read the manufacturer’s label on your fixture. Look for ventilation holes or airflow ratings. Understand whether your fixture allows bulbs to cool properly.
Enclosed fixtures require specific bulbs built to handle trapped heat. These bulbs have reinforced components and better thermal design. They cost more upfront but prevent damage and safety risks. Installing the correct bulb type protects your home and extends bulb life significantly.
How to Tell If a Smart Bulb Is Rated for Enclosed Fixtures
Smart bulbs contain electronic circuits and components in their base that need proper cooling to function safely. When you place a smart bulb in an enclosed fixture, these circuits face serious stress from trapped heat.
Look for the label “enclosed fixture rated” on the bulb’s packaging or product information. This rating means the manufacturer tested the bulb in tight spaces and confirmed it can handle the temperature buildup. Without this label, the bulb is not designed for your enclosed ceiling fixture.
Check the fixture itself as well. Your ceiling fixture should have a maximum wattage rating printed inside the dome or on the mounting bracket. Smart bulbs also list their wattage equivalency. Make sure the bulb’s rating does not exceed what your fixture allows.
Read the warning labels carefully. Many smart bulbs include specific instructions about fixture types. Some say “not for use in enclosed fixtures” or “for open fixtures only.” These warnings exist to protect your home and family.
Ask yourself these practical questions before buying. Is your fixture a closed dome? Does it have an airtight can or recessed design? These enclosed styles trap heat fast. If yes, you must find an enclosed rated option.
Another smart choice involves using a smart switch instead. You can install a regular enclosed rated LED bulb and control it through a smart switch on your wall. This approach gives you smart home features without forcing a smart bulb into a dangerous situation.
Visit the manufacturer’s website if you cannot find the rating on the package. Most companies list compatibility information online. Contact their customer service if you remain uncertain. Taking two minutes to verify the rating prevents costly damage and safety risks later.
Step-by-Step: Installing Smart Bulbs Safely in Enclosed Fixtures
Installing smart bulbs safely in enclosed fixtures requires careful planning and attention to detail. Start by examining your ceiling fixture before you buy anything. Look for a label or marking that shows the fixture’s wattage rating and any restrictions about bulb types.
Next, measure the space inside your fixture. Enclosed fixtures that are very small or cramped leave almost no room for air to move around the bulb. This matters because smart bulbs need some air circulation to stay cool. If your fixture is extremely tight, you may need to consider alternatives like a smart switch paired with a standard enclosed-rated LED bulb instead.
When you’re ready to install, turn off the power at your breaker box first. Safety comes before speed. Wait a few minutes to ensure the fixture is completely cool, then carefully insert your enclosed-fixture-rated smart bulb into the socket. Turn the power back on and test the bulb to make sure it works properly.
During installation, avoid touching the bulb’s base or electronic components with bare hands. Oils from your skin can interfere with heat dissipation. Handle the bulb by its outer plastic casing only.
After installation, observe your bulb’s behavior for the first few hours. The bulb should reach a stable temperature and stay there. If it continues getting hotter, turn it off immediately and remove it.
Keep your fixture clean and dust free. Dust buildup blocks airflow and traps more heat inside. Gently wipe the interior of your fixture with a dry cloth every few months.
Finally, never install multiple smart bulbs in a single fixture. Each bulb generates heat, and combining them in an enclosed space speeds up overheating. Stick to one smart bulb per fixture, and use standard bulbs for any other sockets in that same light.
Best Practices for Ventilation and Fixture Selection
Smart bulbs work best when air flows freely around them. Enclosed fixtures block this airflow, which causes heat to build up quickly inside the base where the electronic circuits live. This trapped heat damages the bulb’s components and shortens its lifespan.
Ventilation matters more than most people realize. Check if your fixture has openings at the top, sides, or bottom. These gaps let hot air escape naturally. Fixtures with solid covers or tight seals create the worst conditions for smart bulbs. If your fixture feels hot to the touch after the bulb has been on for 30 minutes, ventilation is likely inadequate.
The best solution is choosing bulbs specifically labeled “enclosed fixture rated.” These bulbs have better heat management built into their design. Their electronic circuits can tolerate higher temperatures without failing. Always verify this rating before purchasing.
If your fixture cannot accommodate enclosed-rated smart bulbs, consider a different approach. Use a smart switch paired with a standard enclosed-rated LED bulb instead. Smart switches control the light from the wall while the bulb stays simple and heat-resistant. This setup eliminates compatibility problems entirely.
Air circulation inside your fixture depends on its shape and size. Larger fixtures with more internal space allow heat to disperse more easily. Tiny, cramped domes or airtight recessed cans create dangerous conditions quickly. Measure your fixture’s interior dimensions before buying any bulb.
Keep your fixture clean regularly. Dust buildup blocks whatever ventilation exists and traps additional heat. Use a dry cloth to wipe the interior every few months.
Never ignore warning signs. If your bulb flickers, smells burnt, or feels too hot to touch safely, turn it off immediately and remove it. These symptoms mean the internal circuits are failing due to excessive heat. Replace it with an appropriate enclosed-rated bulb designed for your specific fixture type.
Common Mistakes That Lead to Overheating
Many people make simple mistakes that cause smart bulbs to fail in enclosed fixtures. Understanding these errors helps you avoid costly damage and safety hazards.
The biggest mistake is installing non-enclosed-rated smart bulbs in enclosed fixtures. People often assume all smart bulbs work the same way. They don’t. Smart bulbs contain electronic circuits in their base that generate heat. Enclosed fixtures trap this heat with nowhere for it to escape. The circuits overheat and fail within weeks or months.
Another common error involves pairing smart bulbs with old dimmer switches. Many homes have dimmer switches installed before smart home technology existed. These older dimmers don’t work well with smart bulb electronics. The incompatibility causes voltage problems that damage the bulb’s internal components. Your smart bulb may flicker, dim unexpectedly, or stop working entirely.
People also ignore warning labels on packaging and in instruction manuals. Manufacturers clearly state which fixtures are compatible with their products. Skipping this step leads directly to overheating problems. Take two minutes to read the label before installation.
Cramped fixture designs pose another risk. Some ceiling fixtures have very tight spaces with minimal airflow. Installing any smart bulb in these spaces, even enclosed-rated ones, can cause problems. The bulb needs room for air to circulate around its base and electronic components.
Lastly, many people don’t recognize warning signs of trouble. Flickering lights, burning smells, or visible discoloration indicate your bulb is failing. A bulb that’s too hot to touch safely needs immediate attention. Turn off the fixture right away if you notice these issues.
The solution is simple: always check ratings before buying, match bulbs to your fixtures, and stay alert for warning signs. These small steps prevent expensive replacements and keep your home safe.
Warning Signs of Overheating and What to Do Immediately
Your smart bulb might be overheating right now without you knowing it. Learn to spot the danger signs before serious problems happen.
Flickering lights are your first warning signal. When your smart bulb flickers on and off, the electronic driver inside is struggling. Heat damages the circuits in the bulb’s base. This flickering gets worse over time and eventually stops working completely.
A burning smell is an urgent red flag. If you notice this odor near your fixture, turn off the power immediately. Do not wait or ignore it. A burnt smell means the internal components are failing from excessive heat.
Discoloration on the bulb or fixture indicates heat damage. Look for dark spots, browning, or blackening around the bulb’s base or inside the fixture. This shows temperatures climbed too high for too long. The plastic components are breaking down.
The bulb feels too hot to touch. This is your most obvious warning sign. Turn off the light right away. Wait for it to cool completely before touching anything. If the bulb is too hot for your hand, it is definitely too hot for the electronics inside.
Act immediately when you spot these signs. First, switch off the light at your wall switch. Then turn off power at your breaker box for extra safety. Let everything cool for at least 30 minutes before investigating further.
Remove the bulb carefully once it cools down. Inspect the fixture for dust, debris, or blockages preventing airflow. Check the bulb for any visible damage or melting.
Replace the bulb with one specifically labeled for enclosed fixtures. If the problem started quickly, your original bulb was not rated for that fixture type. Never reinstall a bulb showing heat damage.
Monitor your new bulb closely for the first few hours. Watch for any flickering, unusual warmth, or strange smells. Your safety depends on catching problems early.
Troubleshooting Persistent Heat Issues in Ceiling Fixtures
When your smart bulb overheats in an enclosed fixture, you need practical solutions that work fast. The core issue is that enclosed fixtures trap heat around the bulb’s base, where sensitive electronics live. This heat buildup damages the internal circuits that make your bulb “smart.”
Your first option is switching to a smart switch paired with an enclosed-rated LED bulb. This approach keeps the intelligence in your wall switch instead of inside the fixture. The regular LED bulb can handle the heat much better. You get all your smart features without risking bulb failure.
If you already have a smart bulb installed, check whether it’s truly rated for enclosed fixtures. Look at the packaging or manual for this specific rating. Many smart bulbs work fine in open fixtures but fail quickly when trapped in domes or recessed cans. Installing the wrong type is the fastest way to create heat problems.
Avoid pairing smart bulbs with old dimmer switches. Older dimmers weren’t designed for LED technology and can cause flickering. Flickering generates extra heat inside the bulb’s electronics. If you need dimming capability, use a dimmer specifically rated for LED bulbs.
Another practical step involves improving air flow around your fixture. If your fixture has a removable trim ring or baffle, loosen it slightly to allow heat escape. Don’t block any existing vents. Some fixture designs simply cannot accommodate smart bulbs safely, and that’s when switching to a smart switch makes sense.
Monitor your bulb regularly for warning signs. Feel the fixture housing after the light runs for ten minutes. It should be warm but not hot. If it’s too hot to hold your hand against comfortably, turn off the light immediately and let it cool completely before investigating further.
Final Thoughts
Smart bulbs and enclosed ceiling fixtures don’t always mix well. Heat gets trapped inside these fixtures. This trapped heat can damage the delicate circuits inside your smart bulb.
The good news is that you can prevent most problems. Choosing the right bulb makes the biggest difference. Always pick bulbs labeled for enclosed fixtures.
Your fixture type matters too. Airtight cans and cramped domes need special attention. These spaces trap more heat than open fixtures.
Pairing smart bulbs with old dimmer switches causes trouble. These switches weren’t built for modern LED technology. This mismatch creates extra heat and stress on your bulb.
Regular monitoring keeps you safe. Watch for flickering lights or unusual smells. Check for discoloration around your fixture too. These signs tell you something is wrong.
Never ignore a bulb that feels too hot to touch. This is your cue to act fast. Turn off the power right away.
Think about switching to a smart switch instead. Pair it with an enclosed-rated LED bulb. This combination often works better than a smart bulb alone.
Airflow around your fixture helps too. Even small improvements can lower heat buildup. This extends your bulb’s life significantly.
Prevention beats repair every time. Taking simple steps now saves you money later. It also keeps your home safer.
Remember these basics: check ratings, avoid old dimmers, watch for warning signs. These three habits protect your smart bulbs long term.
Enclosed fixtures don’t have to be a problem. With the right bulb and some attention, you can enjoy smart lighting safely. Your fixtures will work better and last longer too.
Smart home technology keeps improving every year. Bulb manufacturers now design products specifically for tricky fixtures. Stay informed about new options as they become available.
Taking these precautions protects your investment. It also gives you peace of mind. Your smart lighting system deserves proper care and attention.
Frequently Asked Questions
Can I use any smart bulb in an enclosed ceiling fixture?
No. Smart bulbs have electronic circuits in their base that generate heat. Enclosed fixtures trap air and prevent cooling. Only use smart bulbs labeled “enclosed fixture rated” for these spaces. Installing the wrong bulb risks overheating, circuit failure, and fire hazards. Always check the packaging before buying.
What’s the difference between enclosed rated and non-rated smart bulbs?
Enclosed rated bulbs have better heat management inside their design. They use materials that withstand higher temperatures. Non-rated bulbs overheat quickly in tight spaces. The electronic driver inside fails when temperatures climb too high. Your fixture label tells you what it supports. Check both your bulb and fixture ratings before installation.
Should I use a smart switch instead of a smart bulb?
Yes, this is a smart alternative. A smart switch paired with an enclosed-rated LED bulb works well in enclosed fixtures. The switch controls standard bulbs without the heat issues. This setup gives you smart home features without overheating risks. You avoid putting electronics inside a hot, enclosed space. This option works especially well if you already have enclosed fixtures.
Why do old dimmer switches cause problems with smart bulbs?
Old dimmers use technology that conflicts with smart bulb electronics. They create electrical noise and heat buildup. Smart bulbs weren’t designed to work with outdated dimming systems. This combination causes flickering, reduced lifespan, and overheating. If you have an old dimmer, remove the smart bulb or replace the dimmer with a modern one.
How often should I check my smart bulb for heat problems?
Check monthly during regular use. Feel the bulb carefully (don’t touch the hot surface directly). Look for discoloration or dark spots on the fixture. Listen for buzzing sounds. Watch for flickering lights. These signs mean your bulb is overheating and needs replacement immediately.