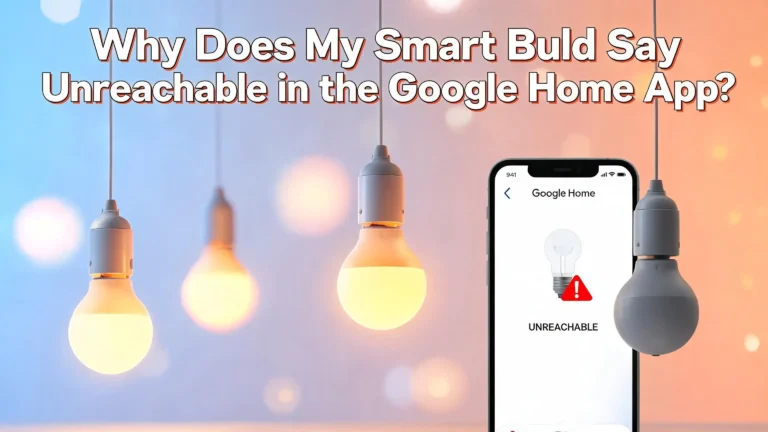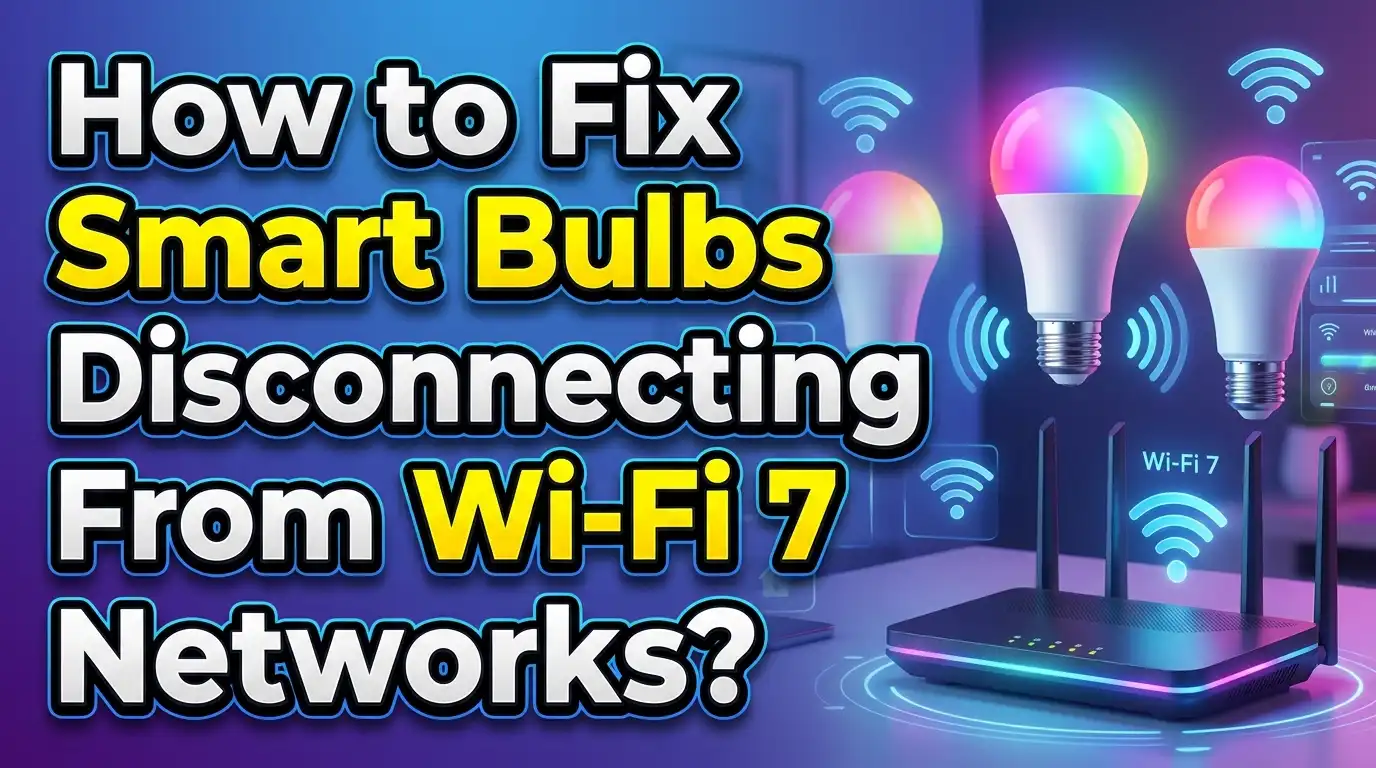
How to Fix Smart Bulbs Disconnecting From Wi-Fi 7 Networks?
You just upgraded to a shiny new Wi-Fi 7 router. Everything seems faster. Your laptop flies. Your phone streams without a hiccup. But your smart bulbs? They keep dropping off the network like they forgot how Wi-Fi works.
The good news is that this issue has clear causes and proven fixes. Wi-Fi 7 routers introduce new technologies like WPA3 encryption, Multi-Link Operation (MLO), and longer wireless management frames.
These features boost performance for modern devices but create problems for older smart bulbs that were built for simpler Wi-Fi standards.
This guide walks you through every practical fix. You will learn why this happens and exactly what to do about it. Each solution includes step by step instructions you can follow right now. By the end, your smart bulbs should stay connected and respond reliably.
Let’s get your smart home back on track.
Key Takeaways
- Most smart bulbs only support 2.4 GHz Wi-Fi and WPA2 encryption. Wi-Fi 7 routers often default to WPA3 or mixed WPA2/WPA3, which causes connection failures and frequent disconnections for older smart devices.
- Multi-Link Operation (MLO) on Wi-Fi 7 routers can confuse single band devices. Smart bulbs that only work on 2.4 GHz may struggle to maintain stable connections when MLO is enabled, because the router tries to manage traffic across multiple bands simultaneously.
- Creating a separate IoT network is the most reliable long term fix. Many Wi-Fi 7 routers from brands like ASUS and NETGEAR offer a dedicated IoT network option that uses WPA2 and the 2.4 GHz band exclusively for smart devices.
- Firmware updates on both the router and smart bulbs often resolve compatibility bugs. Manufacturers have released patches specifically to address Wi-Fi 7 and smart device connectivity issues throughout 2025 and 2026.
- Band steering and Smart Connect features can push smart bulbs off the 2.4 GHz band. Disabling these features or splitting your SSIDs into separate 2.4 GHz and 5 GHz networks gives your smart bulbs a stable connection point.
- Assigning static IP addresses or expanding your DHCP pool prevents IP conflicts that cause smart bulbs to randomly drop from the network, especially in homes with many connected devices.
Why Smart Bulbs Struggle With Wi-Fi 7 Routers
Wi-Fi 7 (802.11be) is backward compatible with older Wi-Fi standards. That means your Wi-Fi 4 or Wi-Fi 5 smart bulbs should technically connect to a Wi-Fi 7 router. In practice, several new features in Wi-Fi 7 create friction with older IoT devices.
The first issue is encryption. Wi-Fi 7 routers default to WPA3 or WPA2/WPA3 mixed mode. Many smart bulbs were manufactured before WPA3 became standard, so they lack the hardware or firmware to authenticate with WPA3. The bulb may connect briefly and then lose its connection as the router enforces newer security protocols.
The second issue involves longer wireless management frames in the 802.11be standard. These frames carry more data to support new features. Older smart bulbs with limited processing power may fail to interpret these frames correctly, causing them to drop from the network.
The third issue is OFDMA and RTS/CTS mechanisms in Wi-Fi 7. These technologies improve efficiency for modern devices but can introduce transmission delays for older ones. Smart bulbs with basic Wi-Fi chips may time out waiting for their turn to communicate.
Pros of understanding these root causes: You can apply targeted fixes instead of guessing. You avoid wasting time on solutions that do not address the real problem.
Cons: Some of these issues require router setting changes that may slightly reduce security or advanced features for your other devices.
Check Your Router’s Default Encryption Settings
The single most common reason smart bulbs disconnect from Wi-Fi 7 networks is WPA3 encryption incompatibility. This should be the first thing you check.
Log into your router’s admin panel. You can usually access it by typing your router’s IP address (often 192.168.1.1 or 192.168.0.1) into a web browser. Look for the wireless security settings. If the encryption is set to WPA3-Personal only, your older smart bulbs cannot connect at all.
If it is set to WPA2/WPA3-Personal mixed mode, some bulbs may still have trouble. The mixed mode is supposed to allow both types of devices, but certain smart bulb chipsets handle the negotiation poorly and disconnect after a short time.
To fix this, change the encryption to WPA2-Personal (AES) for the network your smart bulbs use. If you do not want to downgrade your main network’s security, create a separate network for your IoT devices with WPA2 encryption. Most Wi-Fi 7 routers support this.
ASUS routers label this as the “IoT Network” in their settings. NETGEAR Orbi systems have a “Wireless IoT Settings” section. Check your router brand’s documentation for the exact steps.
Pros of this method: It directly addresses the most common cause. The fix takes just a few minutes.
Cons: Switching your main network to WPA2 reduces security. Creating a separate IoT network adds another network to manage.
Disable Multi-Link Operation (MLO) for Better Compatibility
Multi-Link Operation is a headline feature of Wi-Fi 7. It allows compatible devices to send and receive data across multiple bands at the same time. But MLO creates real problems for single band smart bulbs.
When MLO is active, the router manages traffic across 2.4 GHz, 5 GHz, and 6 GHz bands as a unified system. Smart bulbs that only understand 2.4 GHz can get confused by the way the router coordinates these bands. The result is frequent disconnections and failed reconnection attempts.
Community reports from ASUS, TP-Link, and other router forums confirm this pattern. Users with MLO enabled report that IoT devices disconnect randomly. Turning off MLO often resolves the issue immediately.
To disable MLO on most routers, open the admin panel and find the wireless or advanced wireless settings. Look for an option labeled “MLO” or “Multi-Link Operation.” Switch it to disabled and save the changes. On ASUS routers, go to Wireless > MLO > Enable MLO and turn it off.
After disabling MLO, restart your router and then power cycle each smart bulb by turning it off and on again. Wait a few minutes for all bulbs to reconnect.
Pros: This fix resolves disconnection issues for many users quickly. Your Wi-Fi 7 devices will still connect at high speeds, just without the multi-link bonding feature.
Cons: You lose the latency and throughput benefits of MLO for your Wi-Fi 7 capable devices. This trade off matters most for gaming or streaming on supported devices.
Turn Off Wi-Fi 7 Mode on Your Router
Some Wi-Fi 7 routers include a setting to disable Wi-Fi 7 mode entirely while keeping the router functional on Wi-Fi 6/6E. This is a useful troubleshooting step if other fixes have not worked.
Wi-Fi 7 mode enables all the 802.11be specific features at once. These include MLO, 4096-QAM modulation, and 320 MHz channel widths. While backward compatibility should work in theory, the combined effect of all these features running simultaneously can overwhelm basic IoT device chipsets.
On ASUS routers, log into the settings page and go to Network. Click the Wi-Fi profile of your main network. You will see a “Wi-Fi 7 mode” toggle. Disable it and click Apply. Your router will still broadcast Wi-Fi and your modern devices will connect using Wi-Fi 6 speeds instead.
This is especially helpful as a diagnostic step. If your smart bulbs stop disconnecting after you turn off Wi-Fi 7 mode, you have confirmed that a Wi-Fi 7 specific feature is causing the problem. You can then re-enable Wi-Fi 7 mode and selectively disable individual features like MLO until you find the exact culprit.
Pros: This is a quick way to confirm whether Wi-Fi 7 features cause the disconnections. It restores full compatibility with older devices.
Cons: All devices on the network lose access to Wi-Fi 7 speeds and features. This is best used as a temporary diagnostic measure rather than a permanent fix.
Create a Dedicated IoT Network for Smart Bulbs
Setting up a separate IoT network is the most reliable long term solution. It lets you keep Wi-Fi 7 features active on your main network while giving smart bulbs a stable, compatible connection.
Many Wi-Fi 7 routers have a built in IoT network feature. ASUS routers create a network with “_IoT” added to your main network name. NETGEAR Orbi systems have a dedicated IoT toggle under Wireless settings. These IoT networks default to 2.4 GHz only and WPA2 encryption, which is exactly what most smart bulbs need.
To set this up on an ASUS router, go to Network > IoT Network and enable it. Choose a name and password for the network. Make sure the authentication method is set to WPA2-Personal. Then reconnect each smart bulb to this new IoT network through the bulb’s companion app.
On a NETGEAR Orbi, go to Basic > Wireless > Wireless IoT Settings. Check “Enable IoT Network” and select the 2.4 GHz band. Set the encryption to WPA2-PSK (AES), choose your credentials, and apply.
If your router does not have a built in IoT network option, you can use the guest network as an alternative. Configure the guest network with WPA2 encryption and connect your smart bulbs to it.
Pros: This is the cleanest solution. Your main network keeps all Wi-Fi 7 features. Smart bulbs get a stable, compatible connection. You also gain some security benefit by isolating IoT devices.
Cons: You need to manage an extra network. Some smart home automations may not work across separate networks unless your router supports inter-network communication.
Disable Band Steering and Smart Connect
Band steering is a feature that automatically moves devices between 2.4 GHz, 5 GHz, and 6 GHz bands based on signal conditions. Wi-Fi 7 routers often enable this by default under names like “Smart Connect” or “Band Steering.”
This feature causes problems for smart bulbs because they only work on 2.4 GHz. The router may repeatedly try to push the bulb to a 5 GHz or 6 GHz band. The bulb rejects the band switch and disconnects. This cycle repeats, making the bulb appear unreliable.
To fix this, log into your router’s admin panel. Find the band steering or Smart Connect setting. It is usually under Wireless or Advanced Wireless settings. Turn it off.
Once band steering is disabled, your router will broadcast separate networks for each band. Connect your smart bulbs specifically to the 2.4 GHz network. This prevents the router from attempting any band switches.
Some routers let you keep a single SSID while disabling band steering for specific devices. If your router has a device priority or connection preference option, you can assign your smart bulbs to the 2.4 GHz band permanently without splitting your networks.
Pros: This targets a very common cause of smart bulb disconnections. It is simple to implement and does not reduce your network’s speed for other devices.
Cons: Disabling Smart Connect means your phone and laptop will not automatically switch between bands for the best signal. You may need to manually connect some devices to the 5 GHz or 6 GHz network.
Update Your Router’s Firmware
Router manufacturers have been actively releasing firmware patches to fix Wi-Fi 7 compatibility issues with IoT devices. If you have not updated your router’s firmware recently, this step alone may solve the problem.
TP-Link acknowledged in community forums that Wi-Fi 7 routers have longer wireless management frames that can impact smart device connectivity. They released firmware updates for their Deco and Archer series to address this. ASUS has done the same for their BE series routers.
To update your router firmware, log into the admin panel. Look for a “Firmware Update” or “System Update” option, usually found under Administration or Advanced settings. Click “Check for Updates” and install any available updates. The router will restart after the update completes.
After updating, consider performing a factory reset and setting up the router fresh. This clears old configuration data that may conflict with the new firmware. Then reconnect all your devices, starting with your smart bulbs.
Also check if your smart bulbs have firmware updates available through their companion apps. Brands like Philips Hue, LIFX, Wyze, and Govee release updates that improve Wi-Fi compatibility.
Pros: Firmware updates are free and address known bugs directly. They often improve overall router stability beyond just the smart bulb issue.
Cons: Factory resetting after an update means you need to reconfigure your entire network. Firmware updates can occasionally introduce new bugs, though this is rare.
Assign Static IP Addresses to Your Smart Bulbs
Smart bulbs rely on your router’s DHCP server to assign them an IP address. If the DHCP lease expires or the pool runs out of available addresses, bulbs lose their connection. This problem gets worse in homes with many smart devices competing for IPs.
A static IP address solves this by giving each smart bulb a permanent address that never changes or expires. The bulb always knows its network identity, and the router always knows where to find it.
To assign a static IP, log into your router’s admin panel. Find the DHCP or LAN settings. Look for “Address Reservation” or “Static IP Assignment.” You will need the MAC address of each smart bulb, which you can usually find in the bulb’s companion app or your router’s connected devices list.
Enter the MAC address and assign an IP within your network range but outside the DHCP pool. For example, if your DHCP pool runs from 192.168.1.100 to 192.168.1.200, assign static IPs starting at 192.168.1.201 for your smart bulbs.
If you have many smart devices, also consider expanding your DHCP pool range. Some routers default to a pool of only 32 or 64 addresses, which fills up quickly in a smart home.
Pros: Static IPs eliminate address conflicts and lease expiration issues. This fix is permanent and requires no changes to router security settings.
Cons: It requires some technical knowledge to set up. You must track which IP is assigned to which device. Adding new smart bulbs means adding new reservations.
Move Your Router or Add a Wi-Fi Extender
Signal strength plays a critical role in whether smart bulbs maintain a stable connection. A weak signal does not just slow down the connection. It causes complete dropouts, especially for devices with tiny antennas like smart bulbs.
Smart bulbs have much smaller and weaker Wi-Fi antennas compared to phones or laptops. They need a stronger signal to maintain a reliable link. If your router is in the basement and your smart bulbs are on the second floor, signal degradation through walls and floors can make the connection unstable.
Try moving your router to a more central location in your home. Avoid placing it inside cabinets, behind TVs, or near microwaves and cordless phones that create interference. Even moving the router a few feet can make a difference.
If repositioning is not practical, a Wi-Fi mesh system or a range extender can help. Place a mesh node or extender near the rooms with the most smart bulbs. Make sure the extender broadcasts on the 2.4 GHz band and uses WPA2 encryption compatible with your bulbs.
Check your router’s admin panel for a signal strength map or connected device list. Look at the signal strength (measured in dBm) for each smart bulb. A signal weaker than minus 70 dBm is likely to cause connection drops.
Pros: Improving signal strength helps all devices, not just smart bulbs. Mesh systems provide seamless coverage without manual band switching.
Cons: Mesh systems and extenders cost money. Extenders can reduce overall bandwidth if they use the same channel as the main router.
Reduce Channel Congestion and Interference
Wi-Fi channels are like lanes on a highway. If too many nearby routers use the same channel, congestion slows everyone down and causes devices to disconnect.
This problem is worse in apartments and dense neighborhoods where dozens of Wi-Fi networks overlap. Smart bulbs on the 2.4 GHz band are especially vulnerable because 2.4 GHz has only three non-overlapping channels (1, 6, and 11).
Log into your router’s admin panel and check the current channel for your 2.4 GHz network. Most routers default to “Auto,” which should pick the least congested channel. But auto-selection does not always work well, especially on Wi-Fi 7 routers managing multiple bands.
Manually set your 2.4 GHz channel to 1, 6, or 11 based on which has the least interference. You can use a free Wi-Fi analyzer app on your phone to scan nearby networks and see which channels are crowded. Pick the channel with the fewest competing networks.
Also set the 2.4 GHz channel width to 20 MHz rather than 40 MHz. A wider channel gives more speed but picks up more interference. Smart bulbs do not need the extra bandwidth, and a narrower 20 MHz channel provides a more stable connection.
Pros: Reducing congestion improves connection stability for all 2.4 GHz devices. This fix costs nothing and takes only a few minutes.
Cons: Manual channel selection requires occasional rechecking, as neighbor networks may change. Narrowing the channel width slightly reduces maximum throughput on the 2.4 GHz band.
Power Cycle and Factory Reset Your Smart Bulbs
Sometimes the problem lives inside the smart bulb itself. A corrupted network configuration or stale connection data can cause repeated disconnections that no router setting change will fix.
Start with a simple power cycle. Turn the smart bulb off at the switch or unscrew it. Wait 30 seconds. Then turn it back on. This clears the bulb’s temporary memory and forces it to establish a fresh connection to the router.
If power cycling does not help, perform a factory reset on the bulb. Most smart bulbs reset through a specific on/off sequence. A common pattern is to turn the bulb on for 3 seconds, off for 3 seconds, and repeat this 3 to 5 times. The bulb will usually flash or change color to confirm the reset.
After the reset, set up the bulb again through its companion app. Make sure your phone is connected to the same network you want the bulb to join. For Wi-Fi 7 routers, connect to the 2.4 GHz network or IoT network, not the main 5 GHz/6 GHz network.
During setup, keep the bulb within 10 feet of the router. This ensures a strong signal for the initial pairing. You can move it to its permanent location after it is connected and working.
Pros: Factory resetting clears all stored network data and starts fresh. It solves issues caused by SSID or password changes on the router.
Cons: You lose any custom settings like brightness schedules or color presets. You need to set up each bulb individually, which is time consuming if you have many bulbs.
Limit the Number of Devices on Your Network
Wi-Fi 7 routers can theoretically handle hundreds of devices. In practice, connection quality drops as the device count climbs, especially for low-priority IoT devices like smart bulbs.
Each connected device consumes router resources including memory, processing power, and DHCP addresses. When your network has 50 or more devices, the router may start prioritizing newer, faster devices and deprioritizing smart bulbs. The bulbs get pushed to the back of the line and eventually time out.
Check your router’s connected device list. Count every phone, laptop, tablet, TV, speaker, camera, thermostat, and smart bulb on the network. You may be surprised by the total.
If you have a high device count, the IoT network approach described earlier becomes even more important. It splits the load across two networks and ensures smart bulbs do not compete with bandwidth hungry devices for resources.
You can also reduce unnecessary connections. Disconnect devices you are not actively using. Disable Wi-Fi on devices that work fine on Ethernet, like desktop computers and gaming consoles. This frees up router resources for your smart bulbs.
Some Wi-Fi 7 routers have QoS (Quality of Service) settings that let you prioritize certain device types. If available, set IoT devices to a stable priority level rather than “low” or “background.”
Pros: Reducing device count improves performance for all connected devices. It extends the life and stability of your router.
Cons: Disconnecting devices is inconvenient. QoS settings can be complex to configure and may not be available on all routers.
Check for Interference From Other Smart Home Hubs
Smart home ecosystems often include multiple wireless protocols. Zigbee, Z-Wave, Thread, and Bluetooth devices all share or neighbor the 2.4 GHz frequency space that your smart bulbs use for Wi-Fi.
Zigbee in particular operates on the 2.4 GHz band and can directly interfere with Wi-Fi channels. If you have a Zigbee hub or bridge near your router, the two signals may collide and cause your Wi-Fi smart bulbs to disconnect.
Move your Zigbee hub at least 3 feet away from your Wi-Fi router. Also check which Zigbee channel your hub uses and make sure it does not overlap with your Wi-Fi channel. Zigbee channels 15, 20, and 25 have the least overlap with Wi-Fi channels 1, 6, and 11 respectively.
Bluetooth devices can also cause minor interference, though their lower power output means the impact is usually smaller. If you have many Bluetooth devices near your router, try relocating some of them.
Microwave ovens, baby monitors, and cordless phones also operate near the 2.4 GHz band. Keep your router and smart bulbs away from these devices to minimize interference.
Pros: Eliminating interference improves reliability for all 2.4 GHz devices. It requires no software changes or router setting adjustments.
Cons: Physical relocation of devices is not always practical. Identifying the exact source of interference may require trial and error.
When to Contact Your Router or Bulb Manufacturer
If you have tried all the steps above and your smart bulbs still disconnect, the problem may be a known firmware bug specific to your router model or bulb brand.
Check the support forums for your router manufacturer. Search for your exact router model and “smart device” or “IoT disconnection.” Manufacturers like TP-Link, ASUS, and NETGEAR maintain active community forums where engineers post known issues and workaround timelines.
Similarly, visit the support page for your smart bulb brand. Some bulb manufacturers have published compatibility lists for Wi-Fi 7 routers and may offer specific instructions for your router model.
If you find a known issue without a current fix, request that the manufacturer prioritize a patch. Community pressure on forums often accelerates firmware updates. In the meantime, using a separate IoT network with WPA2 on 2.4 GHz remains the most reliable workaround.
In some cases, very old smart bulbs with outdated chipsets may never work reliably with Wi-Fi 7 routers. If your bulbs are more than 5 years old, they may lack the processing power to handle even backward compatible connections with modern routers. Replacing them with newer smart bulbs that support WPA2/WPA3 mixed mode and Wi-Fi 5 or Wi-Fi 6 will provide a permanent solution.
Pros: Manufacturer support can provide model specific fixes that general troubleshooting cannot. You may discover a patch is already in progress.
Cons: Support response times vary. Very old hardware may not receive updates, and replacement costs add up.
Frequently Asked Questions
Do smart bulbs work with Wi-Fi 7 routers?
Yes, smart bulbs can work with Wi-Fi 7 routers because Wi-Fi 7 is backward compatible with older standards. The problem arises from new default settings like WPA3 encryption and Multi-Link Operation that older smart bulbs cannot handle. Adjusting these settings or creating a dedicated IoT network resolves the issue for most users.
Why does my smart bulb keep going offline on my new router?
Your smart bulb likely disconnects because the new Wi-Fi 7 router uses WPA3 encryption, band steering, or MLO features that your bulb does not support. Check the encryption setting first and switch to WPA2 for the network your bulb connects to. Also disable band steering so the router stops trying to move your bulb off the 2.4 GHz band.
Should I disable Wi-Fi 7 mode to fix smart bulb issues?
Disabling Wi-Fi 7 mode is an effective diagnostic step. If your bulbs stop disconnecting after you turn it off, a Wi-Fi 7 specific feature is the cause. You can then re-enable Wi-Fi 7 mode and disable individual features like MLO to find the exact setting that causes the problem, rather than giving up all Wi-Fi 7 benefits.
Can I use a guest network for my smart bulbs?
Yes, a guest network works well for smart bulbs if your router does not have a dedicated IoT network option. Configure the guest network with WPA2 encryption and 2.4 GHz only. One limitation is that some guest networks isolate devices from each other, which may prevent smart home apps on your phone from controlling the bulbs locally.
How many smart bulbs can a Wi-Fi 7 router handle?
Most Wi-Fi 7 routers can handle 30 to 50 smart bulbs without issues, assuming proper configuration. Performance depends on total device count, DHCP pool size, and available router memory. If you have more than 30 IoT devices, use a dedicated IoT network and assign static IPs to prevent address conflicts and resource exhaustion.
Will updating my router firmware fix smart bulb disconnections?
In many cases, yes. Router manufacturers have released firmware updates specifically to address IoT compatibility problems with Wi-Fi 7. Always update to the latest firmware before spending time on other troubleshooting steps. After updating, a factory reset followed by fresh configuration often gives the best results.