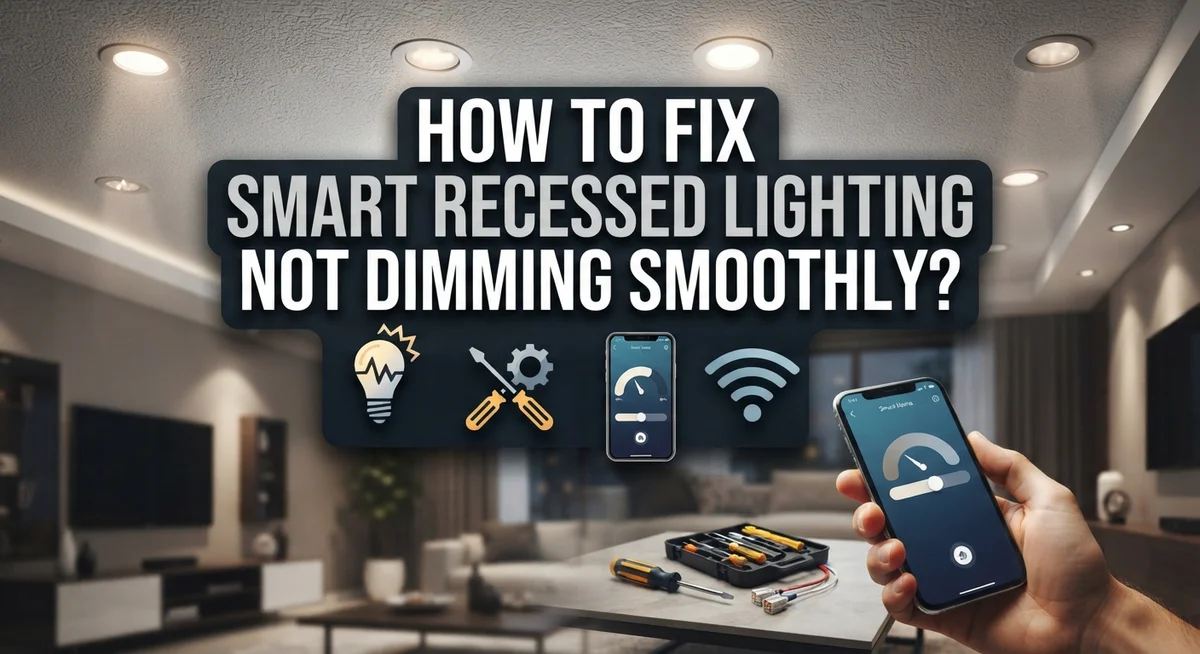
How to Fix Smart Recessed Lighting Not Dimming Smoothly?
Do your smart recessed lights flicker or jump instead of dimming smoothly? You are not alone. This is one of the most common issues homeowners face with modern lighting setups.
The problem often starts with a simple mismatch. Your bulb, dimmer switch, or trim might not work well together. This creates flickering, buzzing, or uneven light levels.
The good news? These problems are fixable. You do not need to replace your entire lighting system.
In this guide, we will walk you through every step to diagnose and fix dimming issues. You will learn how to check bulb compatibility, test your dimmer switch, and choose the right trim for your fixtures.
In a Nutshell
Check your bulbs first. Make sure every bulb is rated as dimmable. Non-dimmable bulbs will flicker or refuse to dim.
Match your dimmer switch to LED technology. Old dimmer switches often fail with modern LED bulbs. You need a switch made for LED loads.
Look at your trim style. Shiny trims can cause glare and uneven light. Shallow trims often distort the beam angle too.
Confirm bulb and dimmer compatibility. Not all LED bulbs work with every dimmer. Always check specifications before you install anything.
Avoid mixing different bulb types. Using different brands or models in one circuit can cause uneven dimming. Consistency matters here.
Test one fixture at a time. This helps you pinpoint the exact cause of flickering. It also saves you time during troubleshooting.
Why Smart Recessed Lights Flicker or Dim Unevenly
Smart recessed lights flicker or dim unevenly for specific reasons. Understanding these causes helps you fix the problem quickly.
Non-dimmable LED bulbs are the most common culprit. These bulbs cannot handle variable power signals from dimmer switches. When you try to dim them, they flicker instead of smoothing out. The bulb’s internal driver simply isn’t built for dimming control.
Incompatible dimmer switches create another major issue. Older dimmer switches use technology designed for incandescent bulbs. Modern LED bulbs need different electrical handling. When old dimmers meet new LEDs, flickering and uneven dimming follow.
Trim selection matters more than you think. Shiny or reflective trims can bounce light unevenly across your ceiling. Shallow trims distort beam angles and create hot spots. These design choices affect how smoothly light transitions during dimming.
Bulb and dimmer mismatches happen frequently. Some LED bulbs work only with specific dimmer types. Others need minimum wattage thresholds to function properly. Installing a bulb that doesn’t match your dimmer’s specifications causes stuttering or jumping during dimming.
Mixed bulb types on one circuit create inconsistent dimming. Combining different brands or models means different internal drivers. Each driver responds differently to dimming signals. The result is uneven light output across your fixtures.
Power supply problems can also trigger flickering. Loose connections in your dimmer switch or fixture wiring reduce power delivery. This instability prevents smooth dimming transitions.
The solution starts with verification. Check your bulb ratings, confirm dimmer compatibility, and examine your trim choices. These three steps address most dimming problems. Test your fixes one fixture at a time to identify exactly what caused the issue.
Checking Bulb and Dimmer Compatibility
Start by checking the packaging or specifications of your recessed light bulbs. Look for the word “dimmable” printed clearly on the box or bulb itself. Non-dimmable LED bulbs will cause jerky, uneven dimming or complete failure to dim at all.
Next, examine your dimmer switch. Older dimmer switches designed for incandescent bulbs often cannot handle LED technology. You need a dimmer switch that explicitly supports LED bulbs. Check the switch label or manual to confirm it works with LED lighting.
Match your bulb wattage to your dimmer’s capacity. Most dimmer switches have minimum and maximum wattage ratings. If your bulbs fall outside this range, dimming becomes choppy or unreliable. Add up the total wattage of all bulbs on that circuit and verify it fits within your dimmer’s specifications.
Check the bulb type your dimmer accepts. Some dimmers only work with specific LED technologies like warm white or color changing bulbs. Mixing incompatible bulb types on the same circuit causes uneven dimming across fixtures.
Verify the dimmer’s control method matches your setup. If you have smart recessed lights, your dimmer must support the same wireless protocol or control system. A standard dimmer won’t communicate properly with smart bulbs, leading to dimming problems.
Test compatibility by removing one bulb and replacing it with a confirmed dimmable LED bulb. Dim the light slowly and watch for smooth, gradual changes. If dimming remains uneven, the dimmer switch itself may need replacement.
Keep your bulb packaging handy while troubleshooting. The specifications label contains critical compatibility information you will reference multiple times.
Step-by-Step Guide to Diagnosing the Dimming Issue
Start your diagnosis by examining the physical setup of your recessed lighting system. Check your dimmer switch first. Look at the switch plate or manual to see if it’s marked as LED compatible. Many older dimmer switches simply don’t work with LED technology.
Next, inspect your bulb specifications carefully. Remove one bulb from its fixture and check the packaging or bulb itself for dimmable ratings. Non-dimmable bulbs will have clear labeling stating they cannot be dimmed. This is the most common cause of smooth dimming failures.
Test your power supply connection. Make sure all wires connecting your dimmer to the recessed fixtures are secure. Loose connections create flickering and uneven dimming patterns. Check that your dimmer receives the correct voltage for your LED bulbs.
Look at your trim selection. The trim is the ring or bezel around your recessed light opening. Shiny or reflective trims can interfere with dimming smoothness by creating uneven light distribution. Shallow trims may also distort how light disperses from your bulbs.
Verify the wattage capacity of your dimmer switch. Your bulbs’ combined wattage must fall within the dimmer’s minimum and maximum range. Bulbs that exceed these limits will dim poorly or not at all.
Test one fixture independently. Remove a bulb from the problematic fixture and replace it with a bulb you know is dimmable and compatible. If dimming works smoothly on this single test, you’ve found your culprit. This isolation method saves time and points you toward the exact component causing issues.
Choosing the Right Trim and Bulb Type for Smooth Dimming
Your trim and bulb choice directly affects how smoothly your smart recessed lights dim. These two elements work together to control light quality and dimming performance.
Trim types matter more than many people realize. Different trims serve different purposes. Shallow trims can distort beam angles and create uneven light distribution. Standard trims provide consistent light spread across your room. Deep trims work best in specific applications like accent lighting. Choose trim depth based on your ceiling height and room layout.
The finish of your trim also impacts dimming smoothness. Shiny or reflective trims can cause glare and make dimming appear uneven to your eyes. Matte finishes distribute light more evenly throughout the space. Baffle trims reduce glare and improve dimming perception. Match your trim finish to your room’s lighting goals.
Bulb type selection is equally critical. Only dimmable LED bulbs work smoothly with dimmer switches. Non dimmable bulbs will flicker or fail to dim properly. Check your bulb packaging for the dimmable rating before installation.
Bulb wattage must match your dimmer switch capacity. Most dimmers have minimum and maximum wattage requirements. Installing bulbs outside these ranges causes poor dimming performance. Your dimmer manual lists these specifications clearly.
Smart bulbs require compatible dimmer technology. Standard dimmers may not work with smart recessed lights. Some smart systems need specific dimmer types to function smoothly. Verify your dimmer supports your smart lighting system before purchase.
Match your bulb color temperature to your trim type. Warm white bulbs work better with certain trims than cool white options. This combination affects how smoothly dimming appears visually.
Start by selecting the right trim for your space first. Then choose dimmable bulbs rated for your dimmer switch. This foundation ensures smooth dimming performance from the beginning.
Adjusting Smart Dimmer Settings and Firmware
Smart recessed lighting systems have settings and firmware that control how smoothly they dim. Understanding these features helps you fix jerky or inconsistent dimming problems.
Start by accessing your dimmer’s settings menu. Most smart dimmers have a control panel or mobile app where you can adjust parameters. Look for options labeled “dimming curve,” “fade time,” or “ramp speed.” These settings control how quickly the lights transition between brightness levels.
Adjust the fade time setting first. This value determines how many seconds it takes for lights to move from one brightness level to another. A slower fade time (around 2 to 3 seconds) creates smoother dimming than rapid transitions. Too fast, and you get jarring jumps in brightness.
Check your firmware version through the app or control panel. Manufacturers release firmware updates that fix dimming issues and improve compatibility. An outdated firmware version may cause stuttering or flickering during dimming sequences.
Update your firmware if a newer version exists. Most systems have an automatic update option, but you can also check manually. After updating, restart your dimmer switch completely by turning off power at the breaker for 30 seconds.
Look for a “minimum brightness” setting in your dimmer controls. This prevents lights from flickering at very low levels. Set it to around 10 to 15 percent brightness to avoid the flicker zone.
Test your dimming after each adjustment. Change one setting at a time and observe the results. This helps you identify which setting actually improves your dimming smoothness. Keep notes on what works best for your specific lighting setup.
Common Mistakes That Cause Dimming Problems
Most dimming problems stem from simple mistakes during setup. Understanding these errors helps you fix issues quickly.
The biggest mistake is using non-dimmable LED bulbs. Many people assume all LED bulbs work with dimmer switches. This is wrong. Non-dimmable bulbs flicker, stutter, or refuse to dim at all. Always check your bulb packaging for a “dimmable” label before installation.
Your dimmer switch matters equally. Standard dimmer switches don’t support LED technology. They work fine with old incandescent bulbs but cause problems with LEDs. You need a dimmer specifically rated for LED bulbs.
Mismatched wattage creates another common problem. Your dimmer has a minimum and maximum wattage range. If your bulbs fall outside this range, dimming becomes jerky or unreliable. Check your dimmer’s specifications and match them to your bulb wattage exactly.
Wrong trim selection disrupts smooth dimming more than people realize. Shiny or reflective trims create glare and distort light output. Shallow trims compress beam angles and interfere with dimming performance. Deep trims with matte finishes provide better dimming control.
Incompatible smart technology causes additional headaches. Smart recessed lights need dimmers that support their specific protocol. Mixing different brands or older dimmer technology with newer smart bulbs creates communication failures. The lights won’t respond smoothly to dimming commands.
Poor electrical connections introduce hidden problems. Loose wires or faulty connections cause voltage fluctuations. These fluctuations make dimming appear uneven or unreliable. Ensure all connections are tight and secure.
Finally, ignoring firmware updates causes performance issues. Your smart dimmer system needs current software to function properly. Outdated firmware creates dimming glitches and compatibility problems. Check for updates regularly through your system’s app or control panel.
Troubleshooting Persistent Flickering or Jumpy Dimming
Flickering or jumpy dimming happens when your smart recessed lights struggle to communicate with the dimmer switch. This problem is frustrating but fixable with the right approach.
Start by isolating the problem. Turn off power to one fixture and test it alone. If that single light dims smoothly, your issue involves multiple fixtures working together. If it still flickers, the problem is with that specific bulb or fixture connection.
Check your electrical connections next. Loose wires inside the dimmer housing cause erratic dimming behavior. Turn off power at the breaker, then carefully inspect all connections behind your dimmer switch. Tighten any loose terminals you find.
Verify your dimmer switch compatibility. Not all dimmers work well with LED technology. Some older dimmer models create a buzzing sound and cause flickering when paired with LED bulbs. Your dimmer needs to be rated for LED use specifically.
Examine your bulb specifications carefully. Dimmable LED bulbs have different internal circuitry than standard LEDs. Non dimmable bulbs flicker when you adjust brightness because they cannot handle variable power levels. Always purchase bulbs labeled as dimmable.
Check the wattage load on your dimmer. If you have too many fixtures connected, the dimmer may struggle to regulate power smoothly. Most dimmers have a minimum and maximum wattage rating. Count your total bulb wattage and ensure it falls within the acceptable range.
Test with a different bulb type. Swap one bulb with a different dimmable model to see if the flickering stops. This helps you identify whether the problem is bulb specific or system wide.
If flickering persists after these checks, your dimmer switch likely needs replacement with an LED compatible model.
Maintaining Consistent Performance Over Time
Keeping your smart recessed lighting performing smoothly requires regular attention to a few key areas. Consistency matters most when you want dimming to work perfectly every single time.
Start by checking your bulb condition monthly. Dimmable LED bulbs degrade over time, and older bulbs often dim less smoothly than new ones. Look for any visible damage or discoloration on the bulb surface. Replace any bulbs that show wear.
Test your dimmer switch regularly by adjusting brightness through its full range. If you notice any stuttering or hesitation, your switch may need cleaning. Dust buildup inside the switch reduces performance significantly.
Keep your firmware current at all times. Set your smart system to check for updates automatically. New firmware versions often fix dimming issues you don’t even know exist yet. Manual checks once monthly ensure you catch important updates quickly.
Monitor your electrical connections every few months. Loose wires cause intermittent dimming problems that get worse over time. Turn off power completely before inspecting any connections behind fixtures.
Record what settings work best for your space. Note the fade time, minimum brightness level, and any other adjustments you’ve made. This information helps you spot problems faster if dimming performance changes suddenly.
Clean your recessed light fixtures twice yearly. Dust accumulation affects how light appears to dim smoothly, even when the dimmer works perfectly. Use a soft brush to gently remove debris from the trim and bulb area.
Pay attention to temperature changes in your space. Extreme heat or cold can affect dimmer performance. If your dimming gets worse during seasonal changes, temperature sensitivity may be the cause.
These simple maintenance steps keep your smart recessed lighting working smoothly for years.
Final Thoughts
Smooth dimming comes down to matching the right parts together. Your bulbs, dimmer switch, and trim all need to work as a team.
Compatibility checks matter most. Before you install anything, confirm your bulbs are dimmable rated. Check that your dimmer switch supports LED technology too.
Skipping this step causes most dimming problems. A non-dimmable bulb will never dim smoothly, no matter how good your dimmer switch is.
Trim selection plays a bigger role than most people expect. Shiny trims create glare that makes dimming look uneven. Shallow trims distort the beam angle and affect light quality.
Choose trims that fit your specific application. This small detail makes a real difference in how your lights perform.
When problems do happen, work through them step by step. Test one fixture at a time to isolate the issue quickly.
Check your connections, verify compatibility, and swap bulbs if needed. This process helps you find the exact cause fast.
Regular maintenance keeps your system running well. Monthly bulb checks and firmware updates prevent many issues before they start.
Temperature changes affect performance too. Keep this in mind if your lighting is in a space with extreme heat or cold.
Smart recessed lighting rewards careful setup and consistent care. When you match your bulbs, dimmer, and trim correctly, dimming becomes smooth and reliable.
Take time to verify compatibility before installation. This single step saves you hours of troubleshooting later.
With the right components and regular attention, your lighting will dim smoothly for years. Small efforts now prevent bigger headaches down the road.
Frequently Asked Questions
Why does my smart recessed lighting flicker instead of dimming smoothly?
Flickering usually means your dimmer switch and LED bulbs don’t work together. LED technology needs special dimmer switches designed for it. Standard dimmers often cause flickering with LEDs.
Check your dimmer switch first. Look for “LED compatible” or “LED dimmable” labels on it. If your dimmer is old or not rated for LEDs, you need a different one.
Next, verify your bulbs are actually dimmable. Non-dimmable LED bulbs will flicker on any dimmer. Read the bulb packaging carefully for dimmable ratings.
Can I use any trim with my recessed lights?
No. Different trims affect how light spreads and how your dimmer performs. Shiny or reflective trims can cause glare and dimming problems.
Shallow trims distort the light beam and interfere with smooth dimming. Deep trims work better for most applications. Choose trims that match your room’s purpose.
The trim type you select impacts overall performance. Mismatched trim and bulb combinations create dimming issues.
What wattage should my dimmer handle?
Your dimmer needs enough capacity for all your bulbs combined. Add up the wattage of every bulb on that dimmer circuit.
Most dimmers have minimum and maximum wattage ratings. Your total load must fall within that range. Overloading a dimmer causes poor dimming and potential damage.
LED bulbs use less wattage than old incandescent bulbs. This sometimes causes dimmers to underperform because the load is too low. Check your dimmer’s minimum wattage requirement.
How do I know if my bulbs are truly dimmable?
Read the product packaging or specifications carefully. Look for words like “dimmable,” “compatible with dimmer switches,” or “smooth dimming.”
Non-dimmable bulbs will have no dimming mention. Some bulbs work with specific dimmer types only. Match your bulb specs to your exact dimmer model.